Using the ScreenTransferFunction:
If you did the chapter on extracting luminosity data, you have already gotten some exposure to the ScreenTransferFunction process. Either way, there is plenty to learn.
Use Open->File to load the tutorial data for NGC 2170. The file is called:
masterLight-BINNING_1-FILTER_Lum-EXPTIME_300 and has a file type of .FIT
When brought into PixInsight it should look like this:
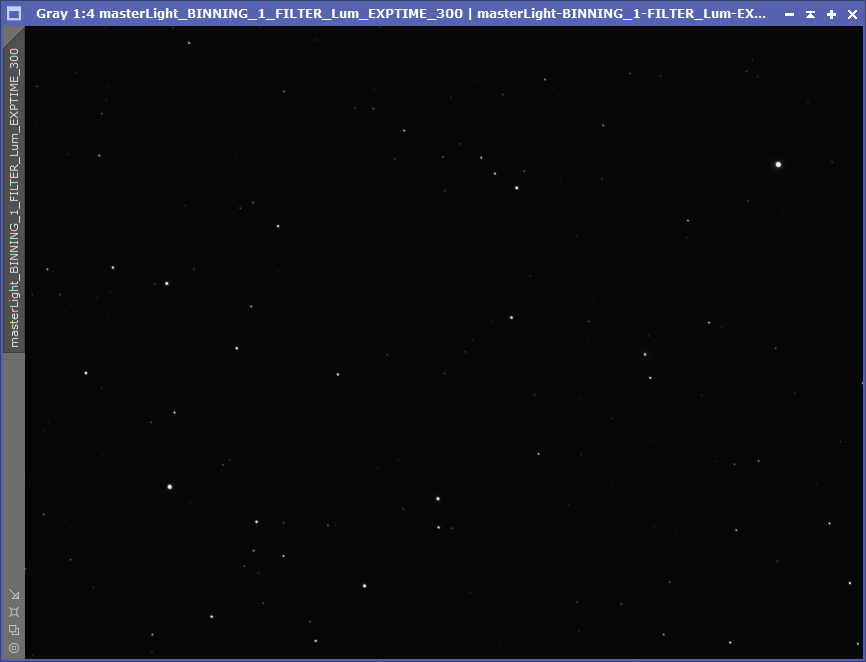
Unedited Luminosity Data for Tutorial Example NGC 2170
This is fairly typical of what luminosity data looks like when it is still in its "linear" state. This state is called linear because the value in each pixel is directly proportionate to the number of photons that were collected by the sensor at that pixel. The exception is if the number of photons exceeded the capacity of the pixel to hold the data. Each pixel has a full well capacity that if exceeded saturates the sensor. There are some other minor exceptions to but unless you are doing photometry (measuring the brightness of objects), you probably don't need to know.
While it might be tempting to think the bright white areas in this image are saturated (they have reached the maximum possible value, almost none of the pixels in this image are actually saturated. Some of them do get pretty close though.
Working with the data while it is linear often is advantageous. However, the problem is that because of the way our eyes work, it is difficult to tell whether we are actually improving things or not. So it is necessary to transform the data in some way so that we can tell what is actually there. We often call that stretching the data. The ScreenTransferFunction process allows us to stretch the data for display purposes, but it leaves the underlying data in its linear state.
There are a couple of ways to apply a ScreenTransferFunction. The easiest is to select the image you want to Auto Stretch. To apply an Auto Stretch press the control key, [ctrl], and then keeping it pressed, press the "a" key. The result should look like this:
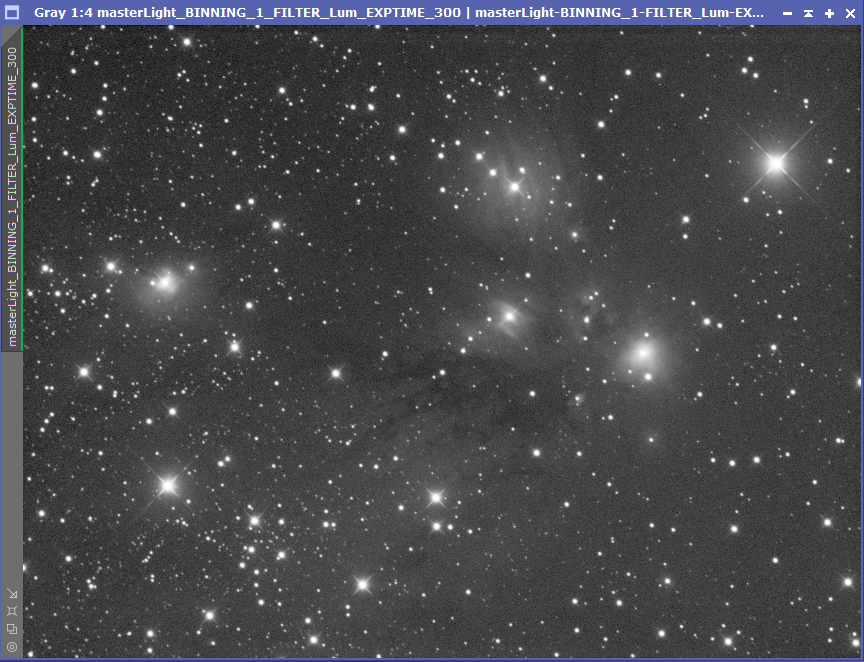
Auto Stretched Linear Luminosity Data.
Behind the scenes, what happened is you actually applied a ScreenTransferFunction to the linear luminosity data. The data itself remains linear, but now we can see what is there and what we are eventually trying to bring out.
Bring up the ScreenTransferFunction Process (under Process->All Processes).
Bring up the ScreenTransferFunction Process (under Process->All Processes).
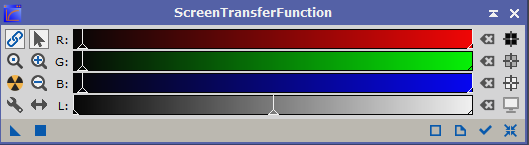
What the ScreenTransferFunction Process Should Look Like when First Brought Up
There are many buttons on this interface, and we are not going to talk about all of them. However, some are worth mentioning at this stage in the game. One of the most important is not on by default.
The Check Mark in blue to the lower right should be clicked on. If you hover your mouse over it, it will tell you that it controls "Track View". That is nice but its function isn't exactly obvious. What it does is when changes are made to the ScreenTransferFunction interface, those changes will be reflected in the display of the selected image.
Another important button is the one to the left of the"Track View" check mark that looks like a page with the upper right corner bent. This brings up documentation about the process. This appears in many processes within PixInsight. How good the documentation is varies. With the ScreenTransferFunction it is at least decent. All to often when you press that button for a PixInsight process, it will have nothing at all.
The button to the right of the checkmark is called "Reset" (again you can tell by letting your mouse hover over it and getting the tool tip). This does what it sounds like and resets the ScreenTransferFunction to a default (unstretched) state. Go ahead and press it. Your image window should now look like it did when the data was first brought in.
To the left is a Circle that is cut into yellow and black wedges (a nuclear warning sign). This button is called "Auto Stretch". If you press it, you will again get a stretched display of the data just like when you originally did a [ctrl]a. If you happen to press stretch while pressing the "Auto Stretch" button you will get a boosted Auto Stretch.
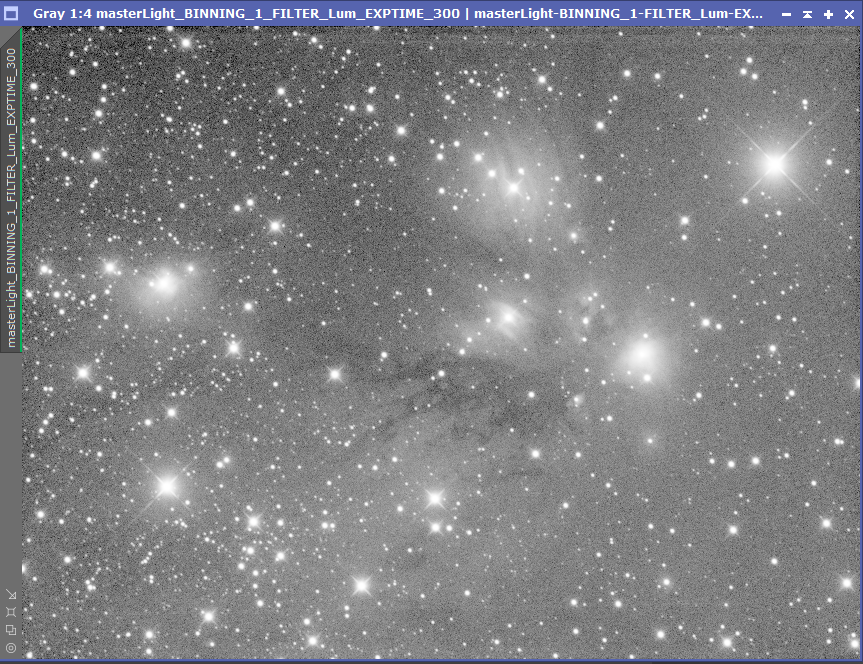
Boosted Auto Stretch
This is only occasionally more useful than the regular Auto Stretch, but for really dim detail in the image, it is available.
There is much more than can be done here, In particular, it is possible to adjust the sliders and affect the stretch. The little magnifying glasses with the + and - signs in them allow you to zoom in and out on the sliders. By zooming in on a slider you can make much more delicate adjustments if you so desire. However, the default Auto Stretch is often quite good.
Play around with the ScreenTransferFunction and get comfortable using it. You will be using it a lot.
There is more to explain about the ScreenTransferFunction, but some of the concepts like the sliders for black Point, white Point, and mid Tones are actually easier to explain when we get to talking about the HistogramTransformation process.
