More About the Shadows Clipping Point:
In the last section, there was a lot of material about setting the various sliders to adjust the Histogram Stretch. But I want to cover some more about the "Why" when it comes to the Shadows Clipping Point.
Load the unstretched file that you created after doing the DynamicCrop process on the master luminosity data. My file is name L_dynamicCrop.fit
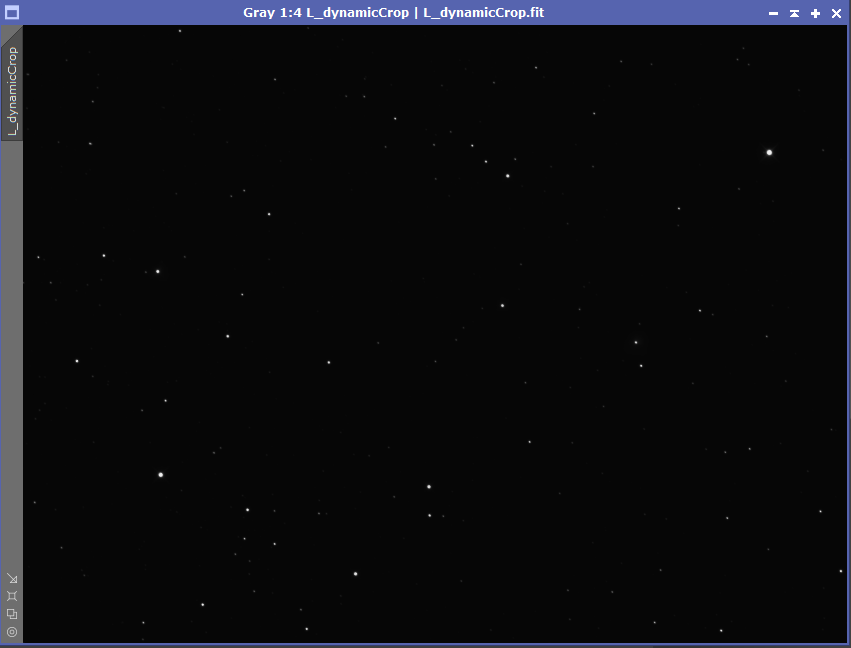
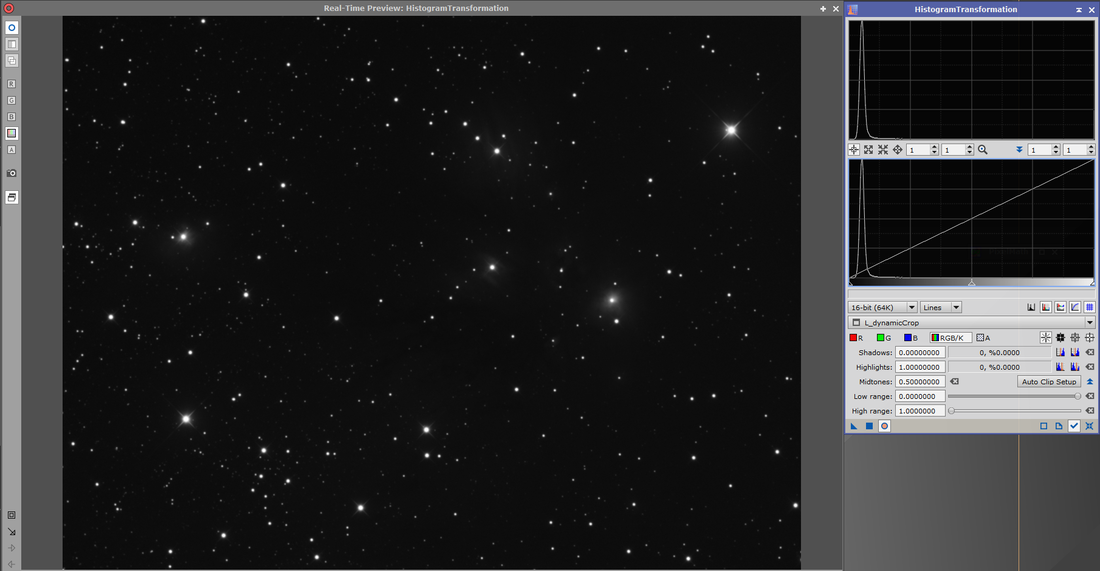
Unstretched L data after DynamicCrop
Now bring up the Statistics Process. Where it says "<No View Selected>", click on that and select your image. Then right under that is a dropdown box. Select "Normalized Real [0,1]".
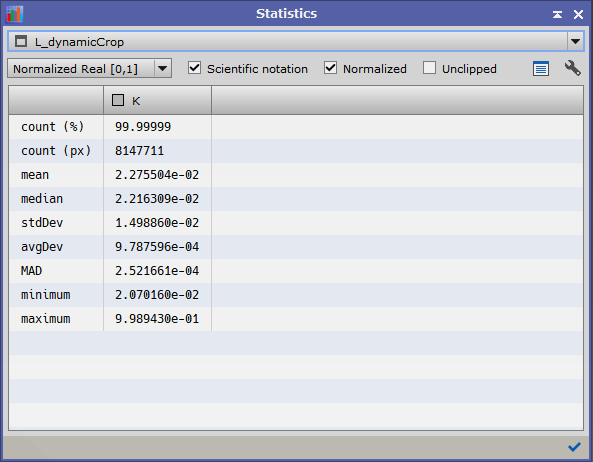
Statistic Process Showing Stats for my Unstretched L data after Being DynamicCropped
Note the number showing after minimum. In the example, it is 2.070160e-02. Now bring up the HistogramTransformation Process again. Make sure the "Track View" buttom (the blue checkmark) is pressed. If you click the Auto zero shadows button (the button I have circled in red), you will see a number next to the Shadows: label. That number should be very similar to what is showing in the Statistics process, except not in scientific notation.

HistogramTransformation Process after Clicking Auto Zero Shadows Button
So there were no pixels in the file that had values below that, and we have now set that to the Shadows Clipping Point. So why isn't there data to the left of that point? Three important ones are
We are now going to create some really bad artificial light pollution. Bring up the PixelMath process and fill it in as follows:
- Light Pollution is a signal that will tend to affect every pixel and add to the signal that you are getting from your object.
- Likewise the Moon, if up, can add signal as well.
- So can the Sun if you haven't waited for complete dark, or if you are getting close enough to sunrise.
We are now going to create some really bad artificial light pollution. Bring up the PixelMath process and fill it in as follows:
PixelMath to Add Fake Light Pollution Signal
The $T says use the target image and for each Pixel in the target image the + .2 adds that value to the image (as a normalized real number). The "Generate output" checkbox says we actually want to do this, and the "Replace target image" says we want to just replace the target image instead of creating a new one.
Now run the pixel math expression on the image we have loaded by dragging the "New Instance" triangle over the image or by using the "Apply" button (the blue square at the bottom). Make sure the HistogramTransformation process is still up when you do this.
Now run the pixel math expression on the image we have loaded by dragging the "New Instance" triangle over the image or by using the "Apply" button (the blue square at the bottom). Make sure the HistogramTransformation process is still up when you do this.
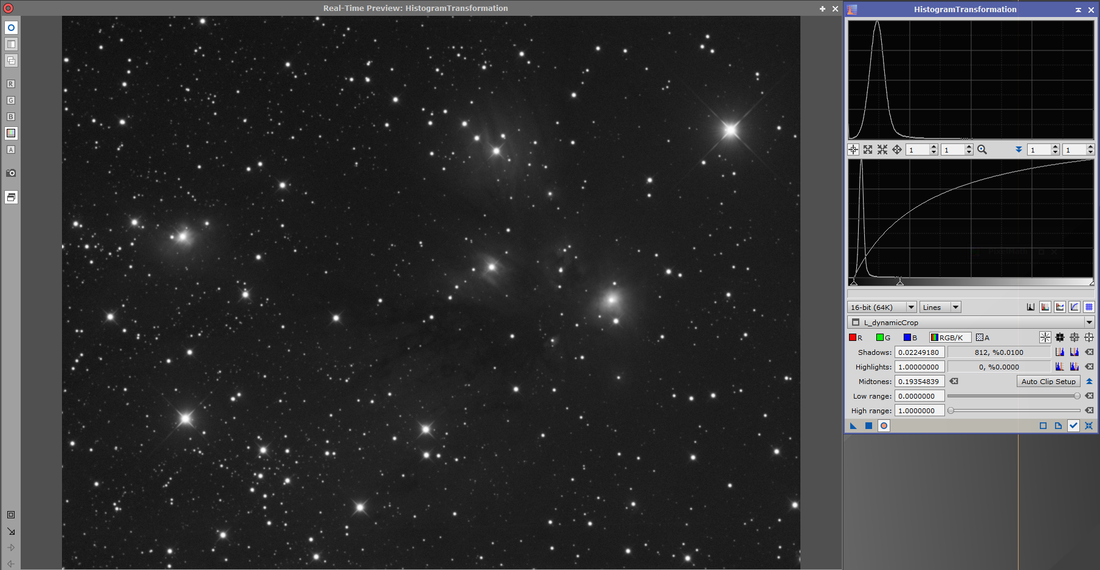
Image After Applying PixelMath and what the HistogramTransformation Process Now Looks Like
That is some seriously nasty noise pollution and things look really washed out. Notice how separated the histogram peak is from the left side. Now this fake light pollution has had some negative affects. For example the stars that are showing are now completed saturated and will be a little bloated once we stretch the image.
If we were to try and stretch the image just moving the Midtones Slider, things would get really ugly.
If we were to try and stretch the image just moving the Midtones Slider, things would get really ugly.
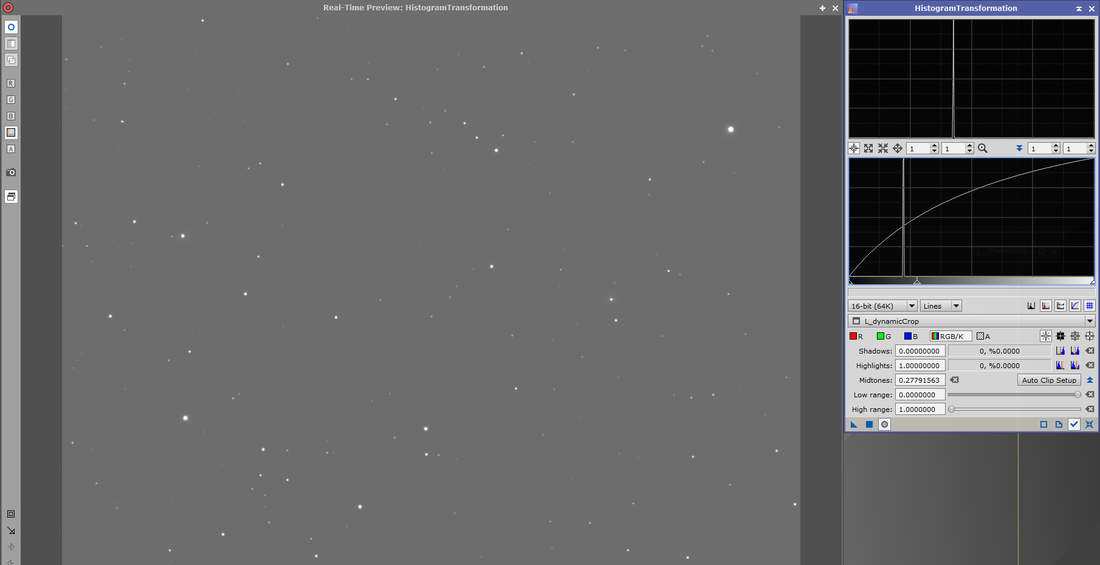
Image Stretch without moving Shadows Clipping Point
No matter how you move just that Midtones slider, the image will never look good. But you might be surprised how much is still there.
Press the "Real-time Preview" button (the unfilled blue circle). Then press the "Auto zero shadows" button again. Then move the Midtones slider to the left until things look about like this. This is our initial stretch. Again we are going to do this in two steps to get more control.
Press the "Real-time Preview" button (the unfilled blue circle). Then press the "Auto zero shadows" button again. Then move the Midtones slider to the left until things look about like this. This is our initial stretch. Again we are going to do this in two steps to get more control.
An initial stretch of the "Light Polluted" Data
When you have it look approximately like the above, then "Apply" the stretch (the blue square) and the then reset the HistogramTransformation process (the button to the right of the blue checkmark).
What The Real-time Preview and HistogramTransformation Process Should Look Like after Applying the First Stretch and Resetting The HistogramTransformation Process
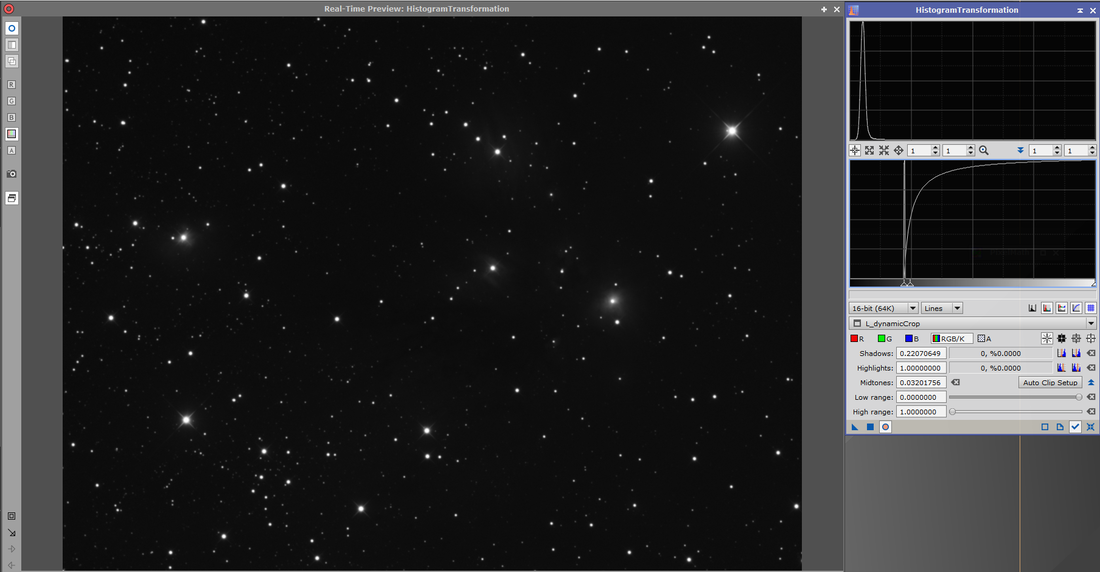
Now do a second stretch by just moving the Midtones slider. Get the peak of the top histogram at about 3/16ths the way to the right.

Applying a Second HistogramTranformation Stretch
As you can see, the data still looks pretty good, despite the artificial light pollution we added. I haven't actually applied the stretch yet. Now instead of pressing the "Auto zero shadows" button, press the one next to it, "Auto clip shadows". This looks even better although somewhat noisier.
Second Stretch After Doing Auto Clip Shadows instead of Auto Zero Shadows
That is now looking pretty good with very little sign of all that artificial light pollution that we added. You can apply and save this if you wish, but we are now done working with this version of the image and no longer need it.
I do want to repeat what I said in the last section. Clipping the shadows like we did in the last step really isn't usually the best way of dealing with things. You will end up with more apparent noise in the image. But in the short run you get more contrast by clipping them slightly. It is a trade-off between apparent noise and contrast. Later, we will get to the use of the CurvesTransformation process and at that point we will learn a better way to get the contrast we desire without clipping the shadows.
So what is the big deal with light pollution anyway if it is that easy to get rid of? Well, real light pollution has two problems associated with it that our artificial light pollution didn't.
These points are true of just about any signal that comes from something other than our object (again like the Moon).
But the Shadows Clipping Point slider helps remove those unwanted signals.
I do want to repeat what I said in the last section. Clipping the shadows like we did in the last step really isn't usually the best way of dealing with things. You will end up with more apparent noise in the image. But in the short run you get more contrast by clipping them slightly. It is a trade-off between apparent noise and contrast. Later, we will get to the use of the CurvesTransformation process and at that point we will learn a better way to get the contrast we desire without clipping the shadows.
So what is the big deal with light pollution anyway if it is that easy to get rid of? Well, real light pollution has two problems associated with it that our artificial light pollution didn't.
- Real light pollution often isn't completely uniform across the field. It often causes a slight gradient that needs to be removed in a somewhat more sophisticated way than just moving the Shadows Clipping Point slider.
- Real pollution consists of both a signal (what we just simulated) and some noise. Without getting deep into the math, the worse the light pollution, the worse the noise. And that noise is more difficult to get rid of. In fact, the best way to get rid of it is to spend more total time on your object. With enough time, much of the noise averages out. But it will never be completely gone.
These points are true of just about any signal that comes from something other than our object (again like the Moon).
But the Shadows Clipping Point slider helps remove those unwanted signals.
