LRGB Combine:
Load this and the final luminosity file. Then bring up the LRGBCombination process. We have already combined the RGB together so we only need to check the L box and fill that in. Also make sure to check the Chrominance Noise Reduction. With some images you may find that it is necessary to move the lightness and saturation sliders to get a pleasant looking image after the combine. That is not the case with this image. [EDIT: In my current workflow, I always do this combination in Photoshop. That is the subject of a separate tutorial. This is how to do it in PixInsight.]
Load this and the final luminosity file. Then bring up the LRGBCombination process. We have already combined the RGB together so we only need to check the L box and fill that in. Also make sure to check the Chrominance Noise Reduction. With some images you may find that it is necessary to move the lightness and saturation sliders to get a pleasant looking image after the combine. That is not the case with this image. [EDIT: In my current workflow, I always do this combination in Photoshop. That is the subject of a separate tutorial. This is how to do it in PixInsight.]
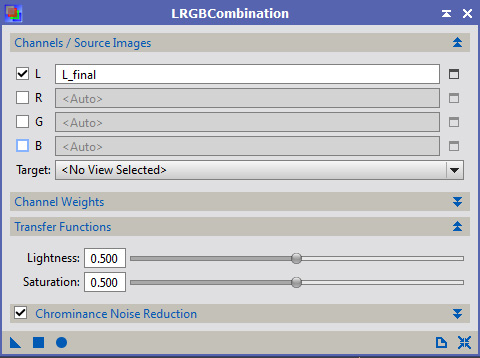
Drag the blue triangle at the bottom left over the registered (aligned) RGB image. This will combine them.
Carefully inspect the edges of the image. Because we have aligned things, it may be necessary to do another crop. That does not happen to be the case here.
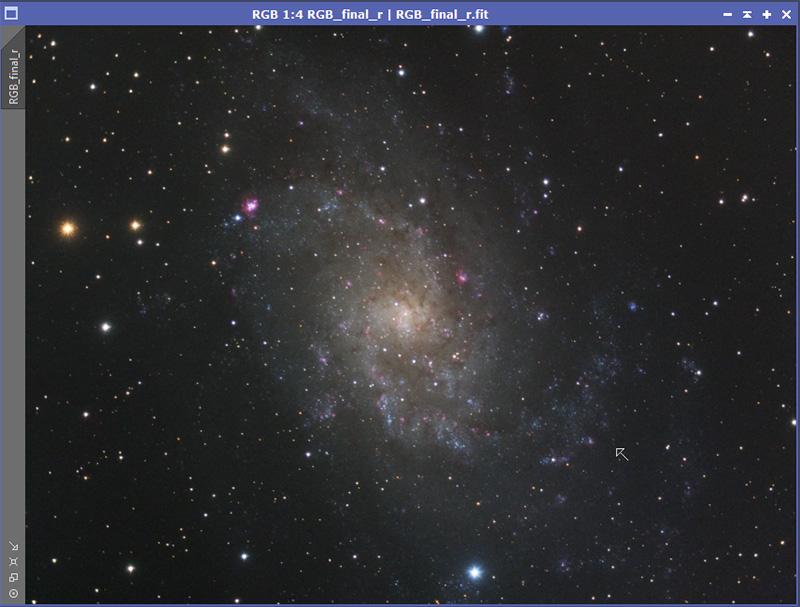
There was a time in the not too distant past I would have been ecstatic with the image as is. However, by adjusting the contrast using CurvesTransformation, we can get the image to pop a little better. Your CurvesTransformation process is probably still set for Saturation, so make sure you set it to RGB/K. Using real-time preview adjust the curve to get more contrast. A kind of S shaped curve will do that and mimic a response more similar to film.
There was a time in the not too distant past I would have been ecstatic with the image as is. However, by adjusting the contrast using CurvesTransformation, we can get the image to pop a little better. Your CurvesTransformation process is probably still set for Saturation, so make sure you set it to RGB/K. Using real-time preview adjust the curve to get more contrast. A kind of S shaped curve will do that and mimic a response more similar to film.
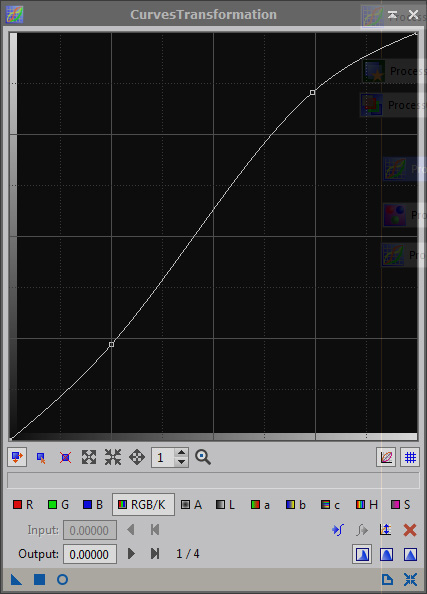
Apply it.
As a free tip, this trick works great on regular photographs as well!
As a free tip, this trick works great on regular photographs as well!
There is now a touch of green in the dim parts of M33 in the left portion of the photo. There are very few things in Astrophotography that are green. Fortunately, PixInsight gives us a tool we need to clean this up, SCNR (Subtractive Chrominance Noise Reduction if you must know). The default settings work fine for our purpose.
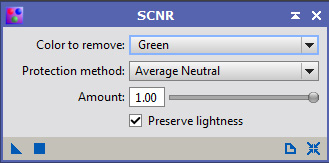
applied...
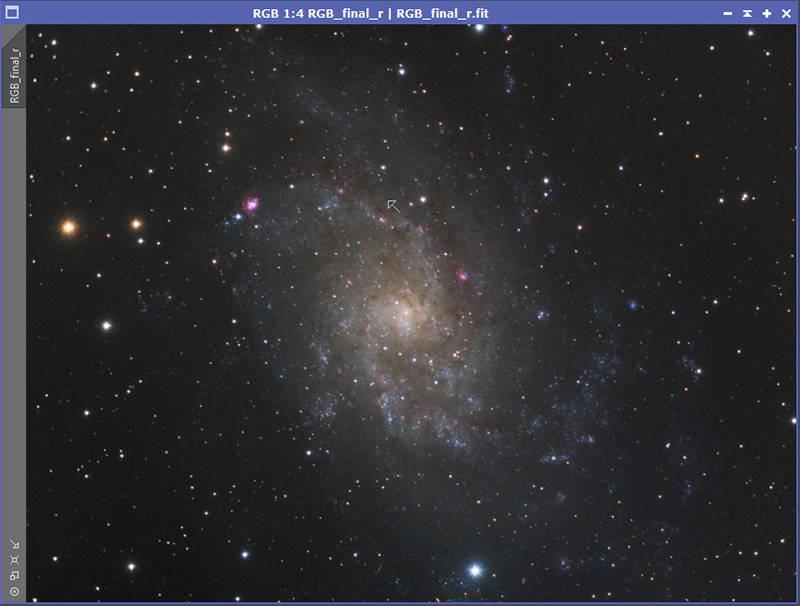
Some people might want to quit right here. Again, there is a certain amount of discretion in image processing, which, aside from skill, is why two people processing the same data will come up with different versions. Personally, I want to boost the brightness of the arms. To do this, I take a final whack at it with CurvesTransformation. To figure out where on the curve I need to really adjust, I run my cursor over the image. The arms have RGB values of around 15 to 20% so that is the area I need to lift. As usual real-time preview is used to fine tune the adjustment.

We apply the curve to the image and at long last, the image has been completed.
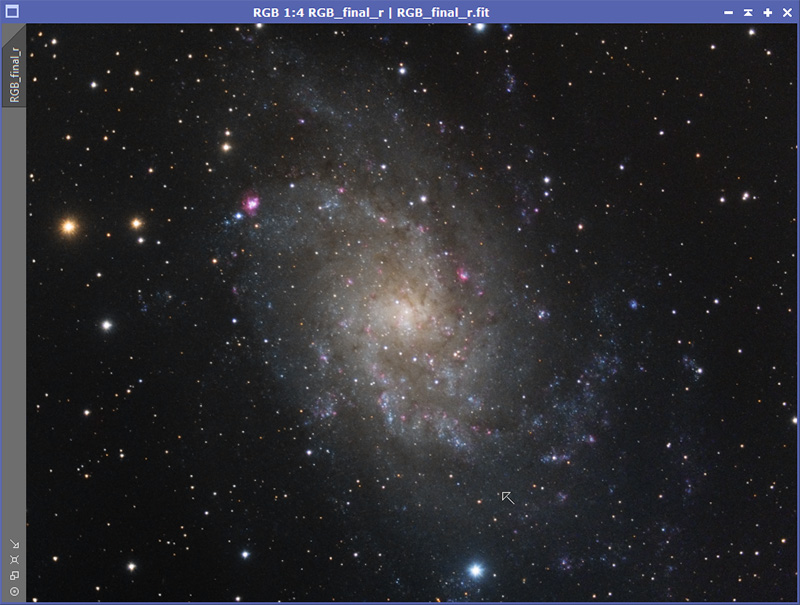
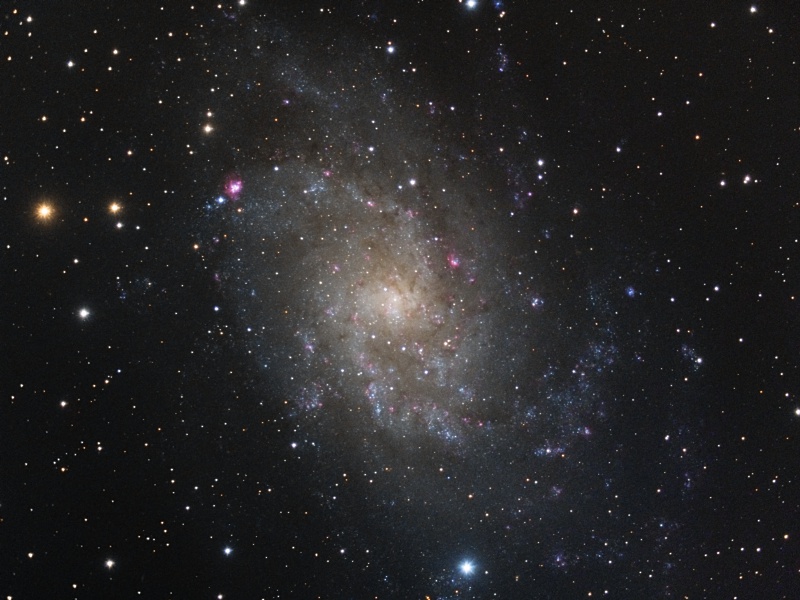
Here is a version that has been resampled to 800 pixels maximum in PixInsight and then slightly sharpened for display on Cloudy Nights.
Messier 33 on Astrobin
Messier 33 on Astrobin
I would be remiss if I did not mention that Harry Page has some great video tutorials on PixInsight. It is primarily how I (and many others) learned.
Harry's tutorials can be found here:
Harry's PixInsight Tutorials
vo Jager, author of StarTools has now produced a Video tutorial for StarTools using this data. I would like to thank him for the time he put into this. It is much appreciated, and I certainly benefit since I own StarTools as well (in fact I purchased it after I bought PixInsight because of some of the things it does so well).
Here is a pointer to that tutorial:
StarTools Tutorial using M33 Data
The fullsize final result
And here is a resized version to meet Cloudy Night Requirements: