Deconvolution Part 2:
If you have saved your 4 files needed for deconvolution and are coming back to this like I am, it is time to load them again. You need the following:
1) The image of M33 we have been working on
2) The PSF image.
3) The star mask
4) The mask for protecting the background (deconv_mask)
Now you want to select the little tab that has the name of your deconv_mask (whatever you called it) and holding down the left mouse button, you want to drag it over to just below the tab with the name of your main image (in my case L_dbe). Then release the mouse button. This should apply the mask to your main image.
Alternatively, right click on your main image. This should bring up a menu. One of the items is Mask and it has a submenu. From there you can "Select Mask". Then you will get a little window that will let you choose from your various images of the right size for your mask. If you happen to love shortcuts, you can bypass all of that and get right to the mask selection window with [ctrl]m. Personally, I use the first method of dragging the little tab.
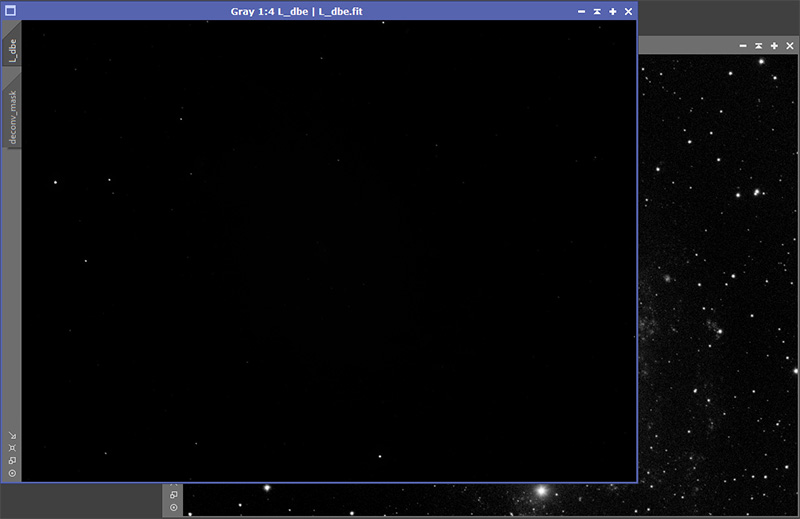
If you have done this correctly, your main image will now have a red overlay that gives you an idea of what is masked and what isn't.
If you have done this correctly, your main image will now have a red overlay that gives you an idea of what is masked and what isn't.
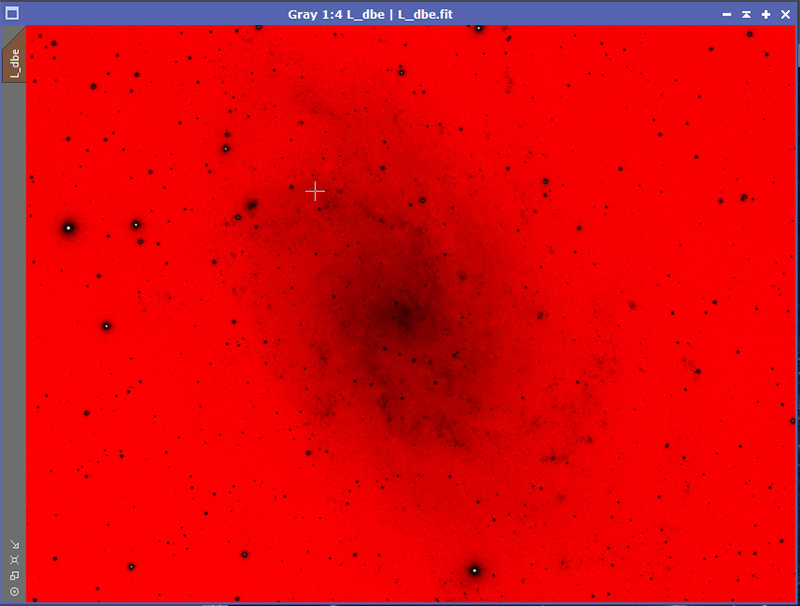
That is great to know one is applied, but fortunately, we can turn off its display. To do this you can either use the mask menu or you can just use [ctrl]k. I use the later.
You can tell a mask is still applied because the tab of the image name will still be colored brown.
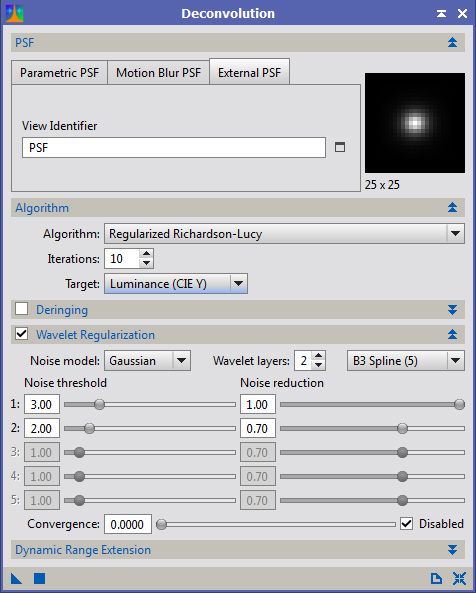
Now bring up the deconvolution process. Click on the tab saying external PSF. Then click the little box next to view identifier and select your PSF image.
You can tell a mask is still applied because the tab of the image name will still be colored brown.
Now bring up the deconvolution process. Click on the tab saying external PSF. Then click the little box next to view identifier and select your PSF image.
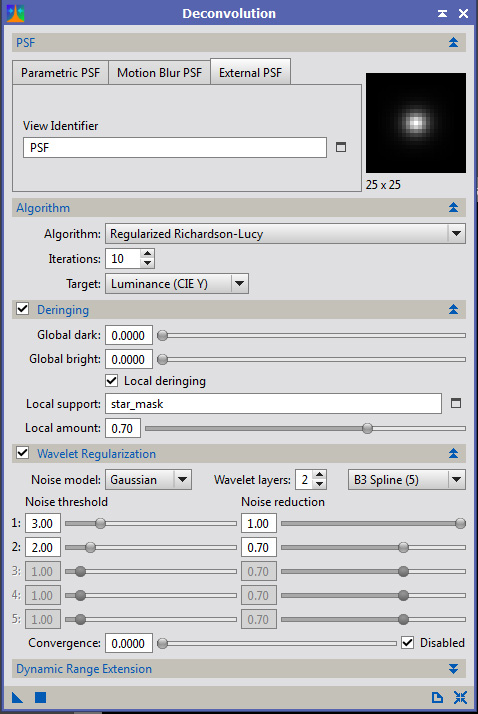
Finally, expand the deringing settings and click on the checkbox to enable deringing. Set Global Dark to 0.0. Check the local deringing box. Click the box next to Local Support and select your star mask.
Now under the Algorithm section, change the iterations to something more useful like 50. This is one parameter you might want to play with.
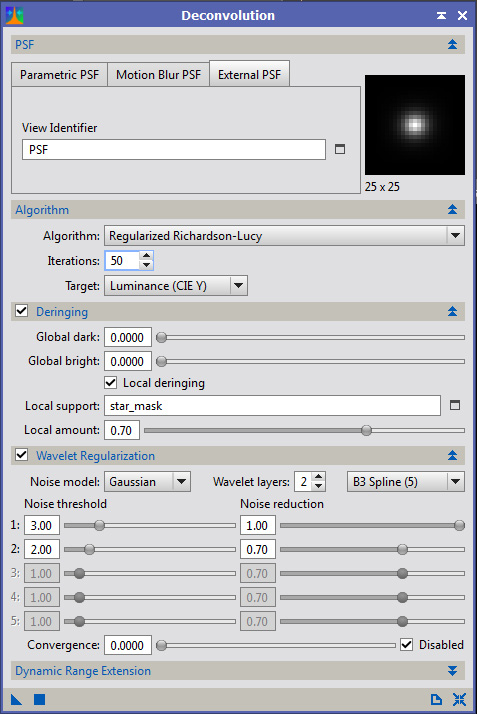
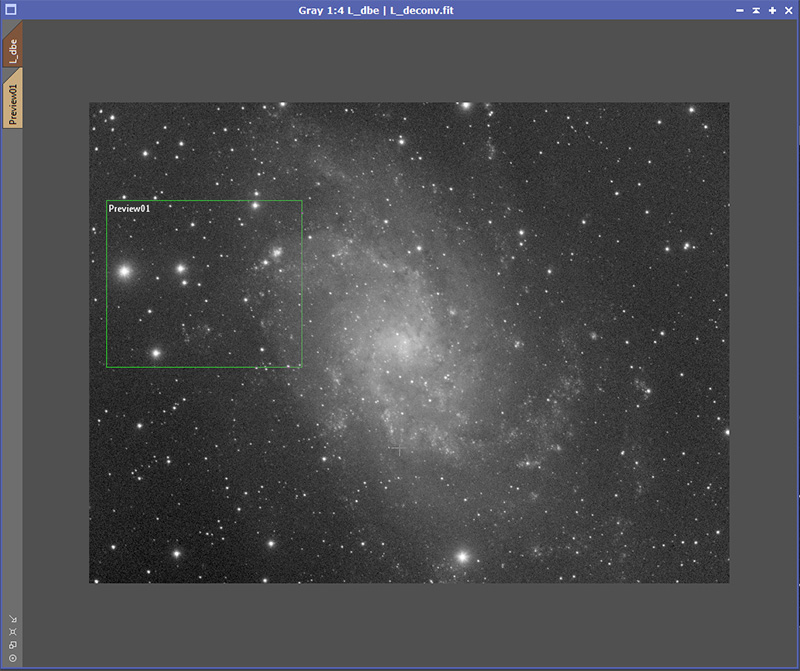
Next we need to define a preview. We do this exactly like we did before ([alt]n left click and drag mouse to define opposite corners). Here is my preview area. You definitely want to preview this because these calculations take a long time on the full image and we may need to adjust deringing to get something reasonable.
Remember to do a screen transfer function on the main image so we can see what we are doing.
Here is my preview defined. That preview area is a good one because:
1) It has some really bright stars (which are easy to mess up)
2) Some regular stars.
3) Detail in the galaxy to be enhanced.
4) Background we don't want messed up.

Select the Preview tab and we are ready to actually try this out. You might want to expand the window some if your preview area is as large as mine so you can see all 4 of those features.
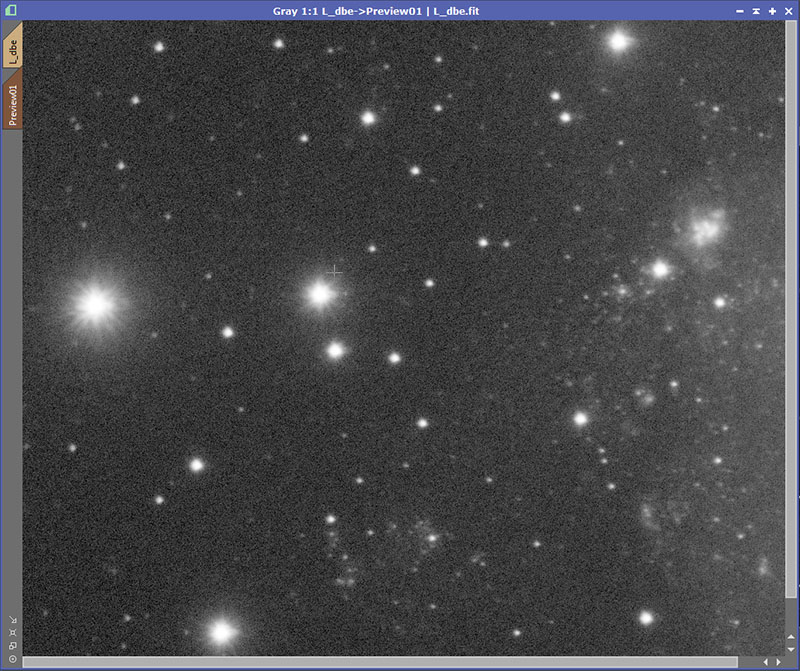
Now drag the little triangle at the bottom left of the deconvolution window over your preview and let the calculations run. My result is this:
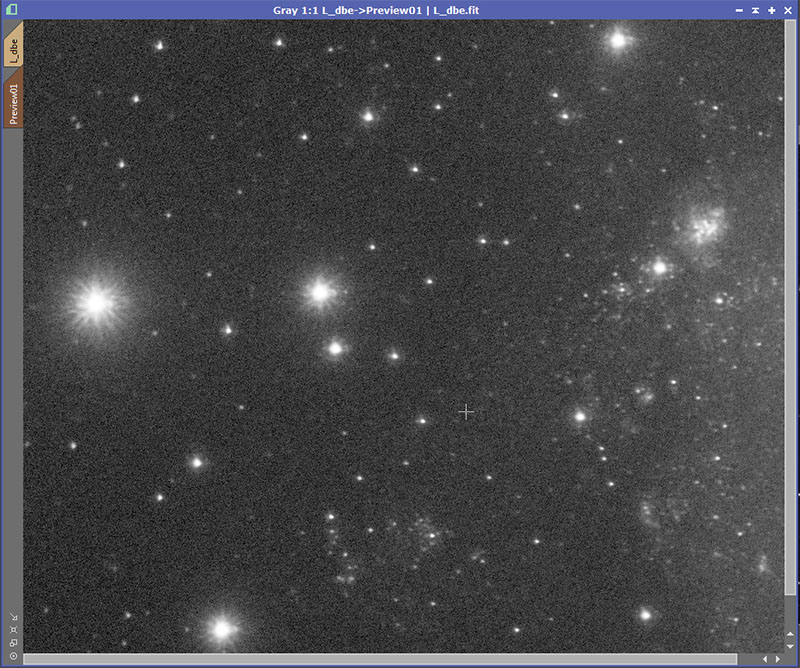
This is already a much better result than when we tried deconvolution with the default settings. Star sizes have shunk nicely, detail in the galaxy is enhanced (especially in that HA region), the background has been protected, and the big stars don't have big holes or anything.
You can toggle back and forth looking at the original and new versions using [ctrl][shift]z.
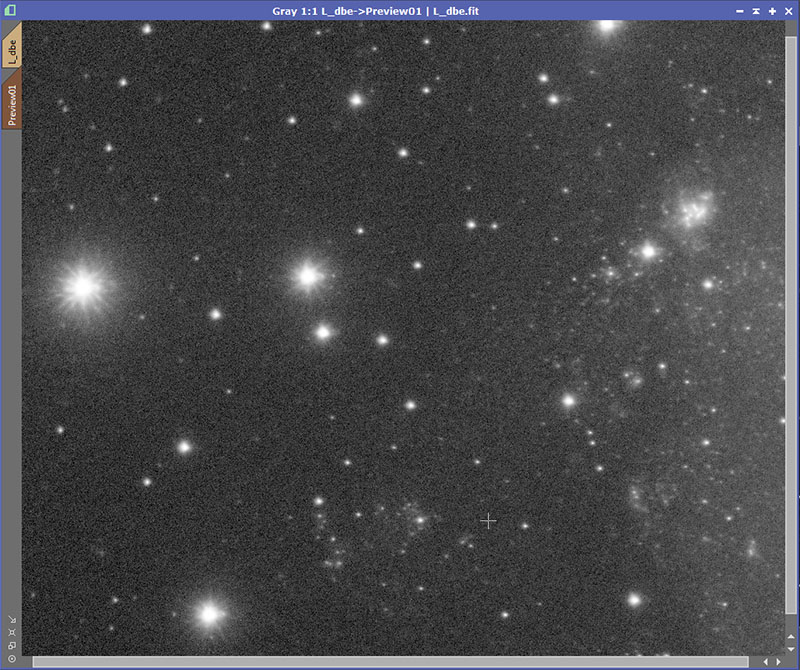
That said, I'm not entirely happy with it. I tried setting the global dark reringing parameter to .01 and I like the result much better.
You can toggle back and forth looking at the original and new versions using [ctrl][shift]z.
That said, I'm not entirely happy with it. I tried setting the global dark reringing parameter to .01 and I like the result much better.
I'm now happy with what I have and I'm going to apply these settings to the image as a whole. I select the tab for the regular image (L_dbe in my case) and then drag the little triangle at the bottom left of deconvolution to my image. This will take a longer time to calculate. It should now be obvious why I used a preview in making my adjustments. It takes a couple minutes to calculate the whole image on my computer.
As soon as it finishes, I save my image (I used L_deconv) as a 32 bit fit.
You can compare the before and after by using the Undo and Redo buttons at the top right of PixInsight.
You might want to zoom in some using your middle mouse wheel when doing these comparisons. Don't forget to make sure you Redo as your last step. Otherwise, you might continue processing on the image before you did the deconvolution and that would waste all this work.

Next up, we are finally ready to stretch our image. But this is a good stopping point for this evening. Besides I'm collecting data on another project tonight. Automation software is wonderful.
