Extracting Luminosity Data:
As mentioned in the introduction, I think this tutorial is best done first with the example data, and then repeating each chapter with your own data.
The first part of the tutorial deals extensively with luminosity data. The example data has a luminosity stack. However, many of you will have color cameras and that does not have luminosity data immediately available. This chapter shows you how to extract the luminosity data so that you can use your own data to follow along the tutorial.
PixInsight has a tool called Channel Extraction. It can be used for a number of different purposes but one of those purposes exactly matches our need. We can extract luminosity data from a color image.
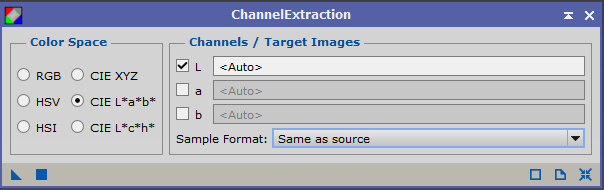
The ChannelExtraction Process in PixInsight
It may not be obvious but images can be represented in many different ways. One of the most common is RGB where the image is split into Red data, Green data, and Blue data. Different ways of representing the data have advantages. One way of representing the data is called CIE L*a*b*.
Like RGB this splits the data into 3 channels. But what is in those 3 channels is very different. The L* channel contains what you could think of as the intensity or black and white information about each pixel in the image. This is called luminosity data. The a* channel contains information about how green vs red a pixel is. And the b* channel contains information about how blue vs yellow a pixel is. For now, all you need to remember is that the L* channel contains information about the black to white intensity of each pixel in the image.
If you really want to learn more about this you can here:
https://en.wikipedia.org/wiki/CIELAB_color_space
To do the channel extraction, you will need to bring your color image into PixInsight. That is done with the File->Open command.
Here is an example color image that is still linear (hasn't been stretched at all). After doing your pre-processing in PixInsight or in whatever pre-processing package you use, your data will probably be linear like this.

Sample Linear Color Image
To auto-stretch it using the ScreenTransferFunction, you can simply select the image by clicking on the bar at the top of the image window. The Window should now have a blue header like above. Then type [ctrl]a by pressing the control key and then the "a" key at the same time. Your image should now be auto-stretched and look quite different. When I do so on this image, it looks like this.
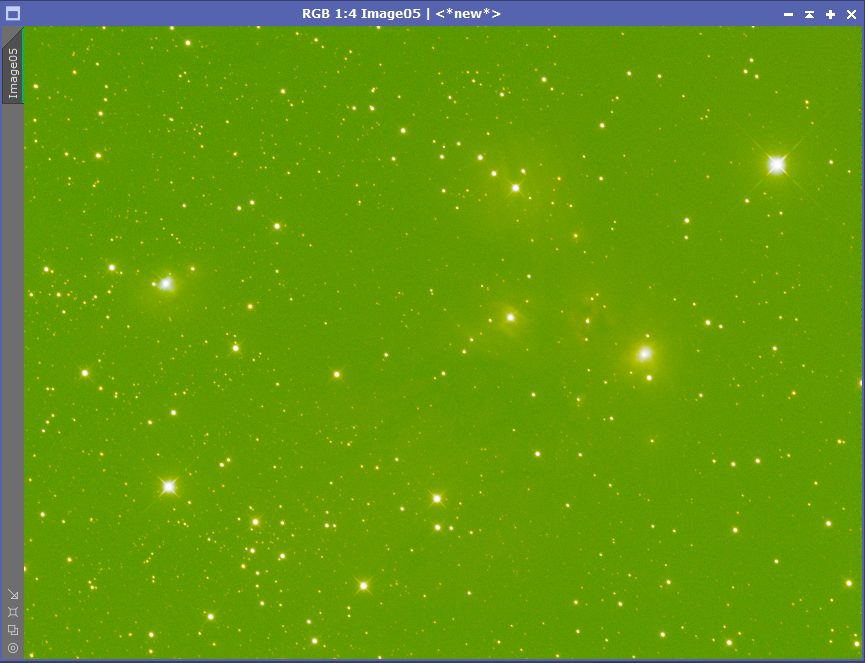
Default ScreenTransferFunction Applied To Image
That is obviously pretty horrid. The reason is that when I used the default, it stretched each color channel an equal amount. That is sometimes best but often it is not, particularly when we first start working with an image. Fortunately, the cure is pretty simple. Bring up the ScreenTransferFunction process.
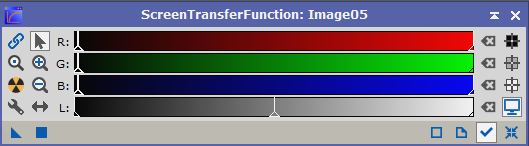
ScreenTransferFunction Process
You want to change two things. First in the upper left corner is a chain link. It will probably be selected. You want to deselect it. This will now allow the ScreenTransferFunction to stretch the different channels independently. Second, make sure the blue check mark in the lower right is selected. This tells the ScreenTransferFunction to track your current view. This means that the image will reflect your various settings within the ScreenTransferFunction. Once we have done those two things, there is a button that looks like a nuclear warning. It is the circle split into yellow and black segments that is located to the left. If you mouse over it without pressing it, it will say Auto Stretch, along with some additional information. (Mousing over parts of the interface and getting information is a handy technique in PixInsight. It is called getting a tool tip.) Go ahead and press that Auto Stretch Button. With my example image, this is the result.
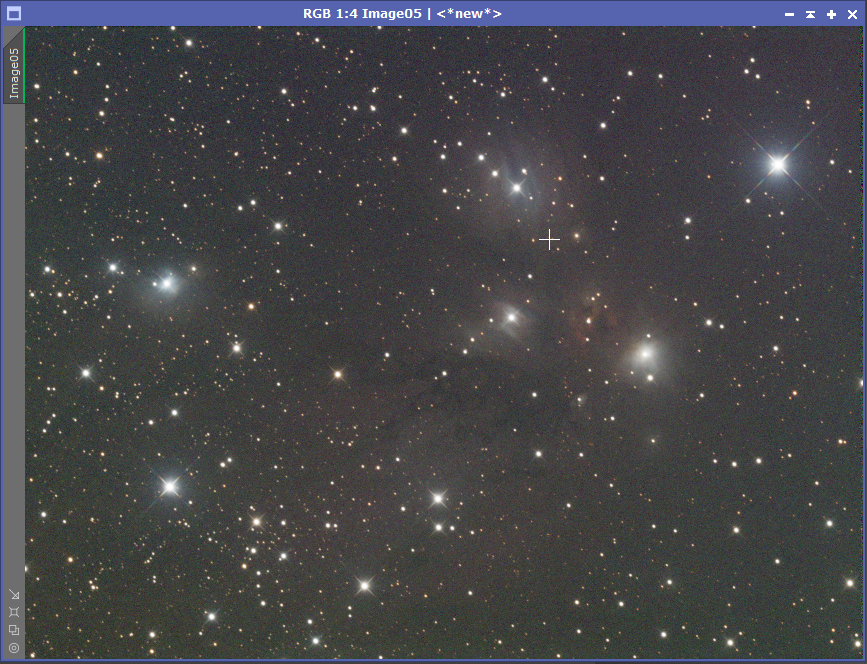
An Unlinked Auto Stretch of the Color Image
That is beginning to look more promising! Now bring up the ChannelExtraction process that was mentioned earlier.
Channel Extraction Process
Under Color Space, make sure to select CIE L*a*b* as above. Under the channels, we are only interested in the luminosity data for now so select the L channel. That will contain the black vs white information about each pixel. Once you have the ChannelExtraction process setup like the image above, it is time to actually apply the process to your image. You can do this a number of different ways. One way is to click hold the blue triangle in the bottom left. Then drag that blue triangle over the image and release it. The other way is to select your image, and then click on the blue square in the ChannelExtraction process. If you get the tool tips for those, the blue triangle will say "New Instance" and the blue square will say "Apply (F5)". For now, the differences between those two are not particularly important. But when you drag the blue triangle, you actual are creating a new instance of that process that leaves the original process alone. We will take advantage of that in the future.
Go ahead and drag the blue triangle (New Instance) over the image or use the blue square (Apply) for ChannelExtraction. You should now have a 2nd version of the image showing that looks something like this:
Go ahead and drag the blue triangle (New Instance) over the image or use the blue square (Apply) for ChannelExtraction. You should now have a 2nd version of the image showing that looks something like this:
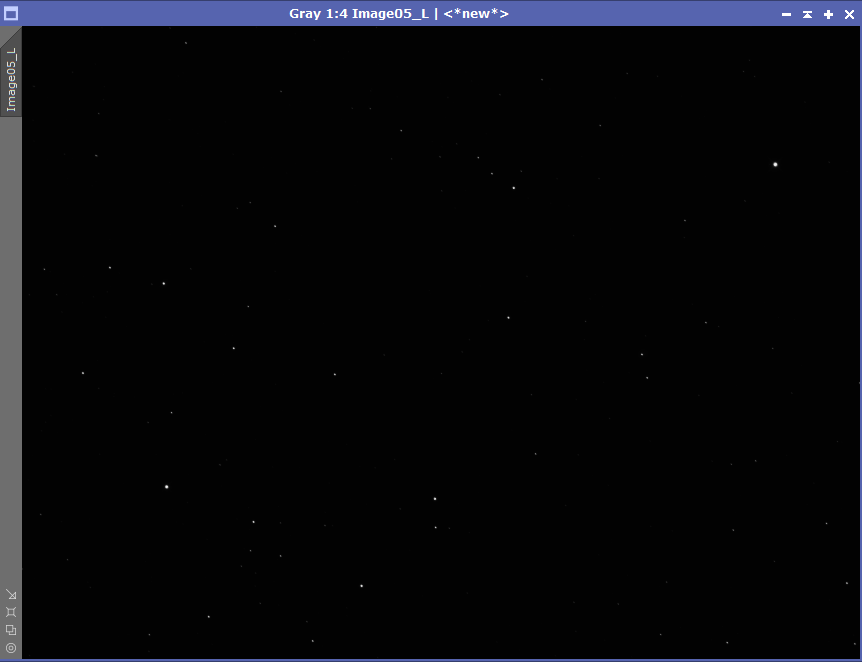
Extracted Luminosity Data
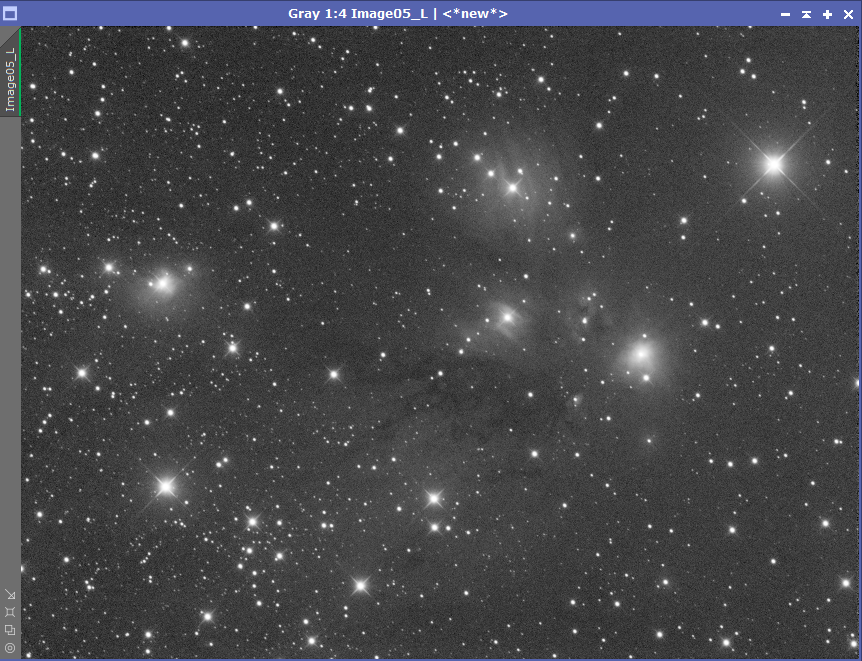
Notice that it is again unstretched and that it has the _L suffix in the header indicating this is luminosity data. Select the window with the newly extracted luminosity data and again to an AutoStretch using either the ScreenTransferFunction or the [ctrl]a shortcut. The result should be a grayscale version of your original color image.
Once you have gotten to this point, use File->Save As to save your newly extracted version of your image for use when following on in the tutorial. Make sure to save it in either FITS or XISF format. The FITS format is more general purpose but the XISF format is somewhat more capable when used with PixInsight.
Like a lot of things in PixInsight there are multiple ways of doing this. In this particular case, there is a shortcut you can take to the above if you just want the L* data. You can go to Image->Extract->Lightness (CIE L*). Since we are going to be using Channel Extract for other purposes, I think it is worth getting exposed to the more involved way from the start.
Like a lot of things in PixInsight there are multiple ways of doing this. In this particular case, there is a shortcut you can take to the above if you just want the L* data. You can go to Image->Extract->Lightness (CIE L*). Since we are going to be using Channel Extract for other purposes, I think it is worth getting exposed to the more involved way from the start.
