We frequently get posts on Cloudy Nights asking about setups. There are many many possible answers to this question, but I thought it might be helpful to detail my setup with an 8" Ritchey Chretien since those are quite popular (and with good reason).
I've been quite deliberate in how I put this rig together and it is performing well for me as a whole. I'm going to be detailing the current end state, but it does NOT need to be done all at once. And I didn't put it together this way all at once.
I'll detail each part and my thinking behind why I made these choices. I did not buy the parts in the order given although the choices I made were consistent with where I ended up. For example, I originally used a Celestron 8" SCT instead of an AT8RC.
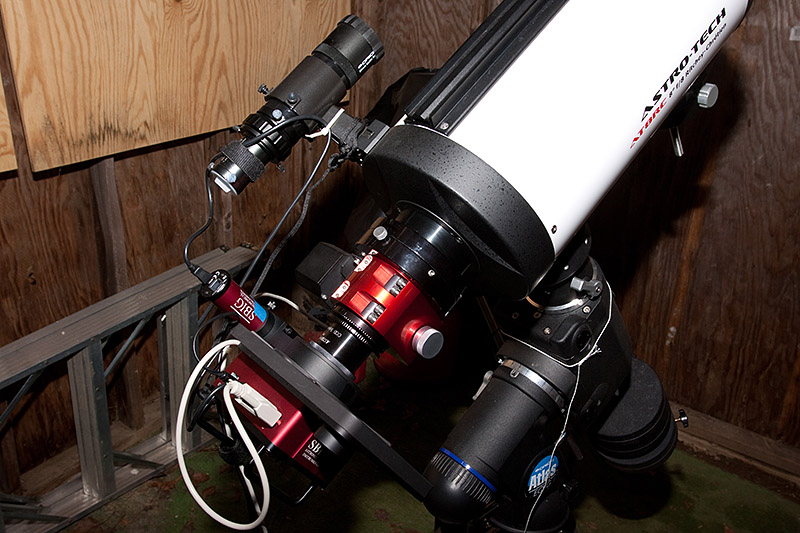
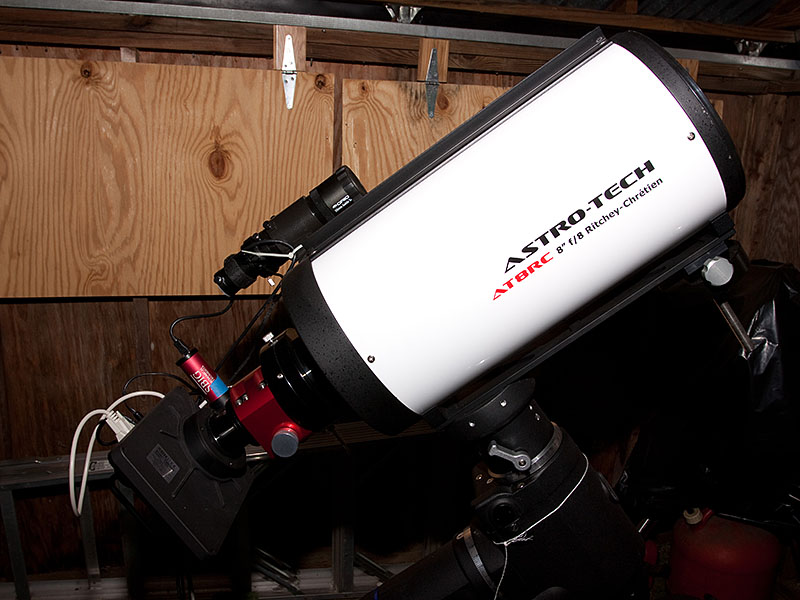
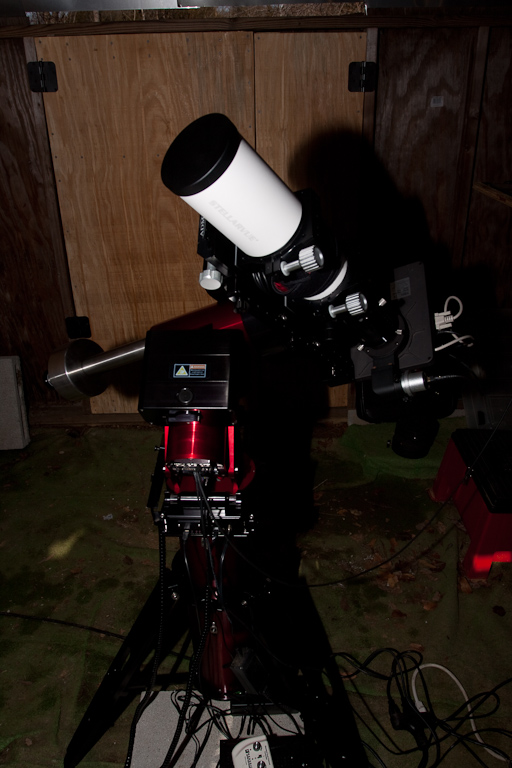
Here are some pictures of my rig. Then I'll get into descriptions and reasoning.
I've been quite deliberate in how I put this rig together and it is performing well for me as a whole. I'm going to be detailing the current end state, but it does NOT need to be done all at once. And I didn't put it together this way all at once.
I'll detail each part and my thinking behind why I made these choices. I did not buy the parts in the order given although the choices I made were consistent with where I ended up. For example, I originally used a Celestron 8" SCT instead of an AT8RC.
Here are some pictures of my rig. Then I'll get into descriptions and reasoning.
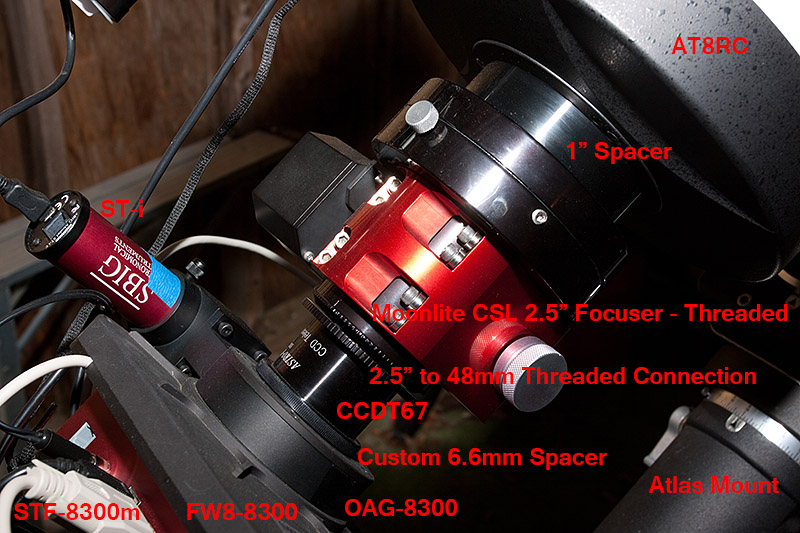
And here is a closeup near the camera where there are a lot of the pieces:
Astro-Tech AT8RC - 895$:
One of the big decisions that needs to be made is desired field of view and image scale. In my case, my seeing normally floats around 3 arc-seconds with occasional good days down to around 2 arc-seconds. That means an image scale of around 1 arc-second gives me well sampled images. At the same time, with available cameras, that gives a reasonable field of view only somewhat smaller than 1 degree on the long axis. That works well for galaxies and for medium and small size nebula. For larger nebula, it is good for detail work.
To achieve that image scale with a 5.4 micron camera (such as in a STF-8300m), I needed a focal length of about 1110 mm. I looked at a lot of alternatives trying to get close to that. Originally I used a Celestron C8 with a f/6.3 focal reducer that I had to get to 1260mm. However, there were lots of problems with that scope.
What finally drew me to this particular scope was when I say images from it that looked great even in the corners and that were around the focal length I desired. The secret ingredient was using a CCDT67 focal reducer.
Strong points of this scope are the RC design which leads to improved off axis performance. The 8" aperture gathers plenty of photons without being so heavy it requires a very expensive mount. It came with a usable focuser that got me started.
This scope comes with both carbon fiber and steel tube options. I went with the steel tube since word on the street was it still held focus reasonable well and I knew I wanted to go with an automated focuser. The money saved with the steel tube helped pay for the focuser.
I should mention that this scope has a well known flaw. Specifically, the focus assembly mounts directly to the primary mirror cell. That means the weight of you imaging train is pulling on the mirror. That leads to differential flexure with a guide scope. I knew about that problem before I got the scope.
I also knew I was going to need to live with it for a while. What that meant is I was going to need to limit my exposure lengths based on how much flexure I was getting.
After getting the scope, with my imaging train I could go 5 minutes before the flexure became objectionable. That happens to match well the ideal exposure time from my orange zone observatory when doing broadband (LRGB). However, it was/is suboptimal for narrowband work. I lived with 5 minute Ha exposures for a while and didn't bother getting into OIII and SII because of this limitation. You will see later on I have now taken steps to overcome this limitation by adding an Off Axis Guider.
This scope also has a reputation for being difficult to collimate. I don't find that particularly to be so, but you do need a Cheshire, and you do need to know how to use it.
Astrophysics CCDT67 - $165 direct from Astro-Physics
This was the crucial piece that allowed me to get where I wanted with the AT8RC. As it turns out, this unit which was designed for an f/14.6 Mak works great with AT8RCs. But it does not work well at full compression of .67. Fortunately it does work great at a compression ratio of around .75. Also fortunately, that compression ratio depends upon the spacing between it and the camera. They have this handy chart that details the spacing requirements:
http://www.astro-physics.com/products/accessories/photo_acc/CCDT67%20&%20...
When I got mine, I could get very close to the spacing I needed by screwing it into the 2" Baader nose piece of my camera which takes 48mm filter threads, just what the CCDT67 provided. That led to a compression ratio of about .73x. It provided an image scale of about .94 arc-seconds/pixel when used with a 5.4 micron pitch camera. And the corners were very good with this combination. The focal ratio worked out to about f/5.86.
As can be seen from the graph above my spacing was about 67mm from the rear flange. Achieving a spacing close to that is crucial for this to work well.
I have tried further spacings for more reduction and things get real ugly in the corners around the rated .67 compression.
You might note that a Canon camera requires about 55mm of backfocus. Since I am working at 67mm with the CCDT67, that means a thin OAG can fit into the system with a Canon DSLR. You will need a way of mating the 48mm filter threads to the OAG.
Orion Atlas - 1499$
I originally had a Celestron CG-5 mount that I used with my Celestron C8 for Astrophotography. I was definitely pushing the weight limits of my mount. The CG-5 also did not have bearings in the declination axis which was affecting guiding performance. (To be clear, I loved the CG-5 for visual work).
I knew I needed to get a better mount if I was going to take my Astrophotography seriously with an 8" sized telescope.
On the other hand, I was limited in funds. While I would love an Astro-Physics mount, the finances weren't there for it.
I started looking at what was available in the under 2000$ class. It needs to be understood that ALL mounts in that category have some compromises.
Mounts I considered included the Orion Sirius, the Orion Atlas, the Celestron AVX, and the Celestron CGEM.
The AVX was eliminated because it still did not have roller bearings on the declination axis. The payload capabilities were only marginally better than the CG-5 (officially if I recall they actually lowered the weight spec but it will handle at least as much as the CG-5).
The Sirius had the better bearings, but again it would have been marginal for the weight. However, if I was building a portable rig, this is the mount I would choose. However, I would go with a 6" telescope instead of an 8".
The CGEM on paper looked pretty good. However, it was having a lot of problems with 8/3 harmonics because of the gearing. It was also having trouble with declination cogging. A firmware update has since been released that attempts to solve that problem (I've heard mixed reviews on the update, but I haven't tracked that for a while so I'm not up on whether it is fixed or not).
The Orion Atlas had a lot of positive press. However, it did have one really significant negative. It is quite heavy (as is the CGEM). Fortunately, I have a roll-off roof observatory, so I only had to transport it the once. People were also not wild about the altitude and azimuth controls. I personally do think they could be better. Fortunately, again since this was going to be in an observatory, I didn't need to adjust polar alignment all that often.
A very big plus for it was that it has EQMOD available for it. This free software is great for controlling the Atlas and the Sirius.
EQDirect - 41$ from Shoestring Astronomy:
Some equipment that can really make the system better is not very expensive. This falls in that category. I mentioned that the Atlas can run with EQMOD. It is possible to run EQMOD through the hand controller, and that is exactly what I did at first. It was mostly reliable. That was the problem. Mostly is a weasel word for saying it wasn't reliable. In particular, the mount was sometimes failing to Meridian flip. I believe the reason is that the cord for the hand controller to the mount and the cord into the hand controller are not secured very well.
EQMod recommends running directly to the mount bypassing the hand controller. But to do that, this little interface must go between your USB to RS-232 Serial adapter. Otherwise, voltages will be wrong and bad things can happen.
There are a number of options. I got the one requiring a physical connection. It attaches much better to the mount and has been very reliable.
SBIG STF-8300m camera - 1995$:
When I started Astrophotography, I used what most people start with and a lot of people stick with, a DSLR. In my case it was a Canon 50d.
However, the lack of setpoint cooling was a bother. I also struggled with correlated pattern noise (the streaks that tend to show up in DSLR images.) Resolution wasn't quite as good as I thought I should get, and narrowband imaging is very suboptimal.
I decided that in my case, the sooner I moved to a CCD, the happier I would be with my results. I know some people get marvelous results with DSLRs. I'm not one of those people.
Looking around I knew that I wanted a camera with a fairly large field of view. I also knew I wanted an integrated system.
I considered the Sony chipped cameras, but the size of the sensors was smaller than I wanted. Weighing the various options, I saw people were getting results I would be happy with cameras using the KAF-8300 based chip. I then needed to decide on a company. SBIG had a decent reputation, they had an integrated system, and download times were reasonable.
There are certainly better cameras out there than this. There are even better KAF-8300 based cameras than this. Even SBIG sells some.
But this price-point was what I could (barely) make myself pay.
I also needed to figure out whether to go Monochrome vs One Shot Color. I decided that for me, I really wanted to eventually be able to get into narrow band imaging. I also decided I wanted the additional resolution you get from a monochrome camera.
As mentioned previously, this camera has 5.4 micron pixels. With the AT8RC and CCDT67 working at around f/5.86 the field of view works out to roughly 52'x39'. That is definitely not a wide field camera. On the other hand, it does frame many objects reasonably well, and even on nebula that are too large, there are often interesting features that work well with it.
One thing that definitely needs to be considered when buying a CCD is that the camera is only on part of the cost. Filter wheels, the filters themselves, etc. will add substantially to the wallet pain.
FW8-8300 - 895$:
This is the integrated filter wheel for the SBIG STF-8300m. I definitely debated this decision. The 5 filter wheel is 200$ less. And I knew that originally, I would be getting just an LRGB set + an HA filter. However, I also knew I wanted to get into narrowband down the road. Adding a OIII and SII filter would take me up to 7 filters. And I certainly didn't want to be opening up the filter wheel and changing them out when I wanted to image broadband vs narrow band.
Baader 36mm Filters (LRGB + 7nm HA) - 395$ + 195$:
I don't regret this decision per se. This is what I could afford at the time. But I will probably be replacing this with a set of Astrodons.
The 7nm Ha filter works well, but I definitely want narrower for the OIII and SII filters. And there are definitely advantages to having the set be roughly parfocal. This is especially true when using an Off Axis Guider, since the thickness of the filter affects the focus. That in turn means that if you have filters of different thickness, then if the guide camera is in focus for some of the filters, it will be a little out of focus for the others. It remains to be determined how significant this effect is. But it may mean I'm replacing my current set.
Moonlite CSL 2.5" Large Format Focuser - Cost depends on options. I paid 844$
At first I simply used the focuser that came with the AT8RC. However, I knew that I wanted to automate my focusing. While my AT8RC held focus reasonably well, I still needed to go out and tweak things from time to time. Also, since I liked rotating my color filters rather so that they are taken in similar conditions, that meant compromising on their focus. With an automated focuser, I could use filter offsets to get the focus right as I rotated between the filters.
Also while the focuser on the AT8RC isn't junk, it is easier to really nail the focus with an automated focuser since the the critical focus zone is so small. I could get it with the help of a Bahtinov mask, but a certain amount of fiddling was required.
Once the time came to purchase, the question was, "which one?". The two biggest names in the business are probably Moonlite and Feathertouch. There are pro and cons each way. What caused me to go with the Moonlite was the way the flange attached to the telescope. In the case of the Feathertouch, it has an adapter that tightens into place. With the Moonlite, the flange simply screws onto the extensions that come with the AT8RC. I was all for keeping things threaded as it seemed more secure to me and also less prone to getting out of square.
Having decided on the Moonlite, there was still the question of what to get. There is the regular SCT model and the heavier CSL model. I ended up buying the heavier CSL model for two reasons:
1) The CCD camera I am using with the FW8-8300 filter wheel is already fairly heavy. And I knew when I bought the focuser I was likely to add an off axis guider as well. I wanted to be absolutely sure the focuser could lift the weight.
2) The CSL model has the option for threaded connections. The regular model with the 2" drawtube does not. The idea of threaded connections is very appealing for a couple reasons.
a) It helps maintain everything nice and square.
b) It is not a connection that is going to slip out of the compression ring with disastrous results to the camera.
With the Moonlite unit, you have to decide on the various pieces: I chose as follows:
The Flange=RC 6" /8" threaded for the Astro-Tech/GSO type RC scopes
The 1 1/2" travel drawtube with 68mm threads
The High Res stepper motor
The Mini V2 controller
And importantly, I also purchased the 2 1/2 inch 68mm thread to 48mm filter thread Adapter. That allowed connecting the Astro-Physics CCDT67 to the focuser completely with threaded connections.
If you look in the picture closely, you will notice that the 68mm to 48mm threaded adapter is not quite what is pictured on the Moonlite site. It turns out they have come out with a new version (which is somewhat more expensive) that has a lock ring. This allows you to lock the connection with the CCDT67 into an orientation other than what you would get by simply screwing it all the way into the adapter. That is quite a nice refinement. Make sure you ask for it.
I debated whether to get the 1 1/2" drawtube or a 2" drawtube. In certain configurations the 2" drawtube will not work so the 1 1/2" tube is recommended. Since the AT8RC comes with 1" spacers, I knew I could get in focus with just the 1 1/2" drawtube so I went the safe route.
I should mention that when I got the Moonlite, I struggled with it a bit. Specifically, it reports focus position in terms of # of steps of the stepper motor. Over the course of time, those numbers would change enough that it clearly wasn't just a matter of temperature drift. Clearly something was slipping.
I thought this was due to the tension on the focuser not being turned up high enough even though the CSL unit supposedly came adjusted so that it should have lifted my cameras weight just fine (and it seemed to manually). So I cranked up the tension some a couple of times with little if any improvement.
Then I realized that perhaps what was really happening is I was running the stepper motor too fast and it was not always stepping properly under load. When I slowed down the stepper rate (which is still plenty fast) the problem disappeared.
This is probably as good a place as any to also mention the 1" spacer. The AT8RC comes with 3 spacer rings, one 2" ring, and two 1" rings. How many you need to use depends on the equipment you have hanging off the back. In this case, the Moonlite focuser is pretty long and just the one spacer is required.
This would also be a good place to mention that those rings can get VERY tight and hard to remove. Do yourself a favor and get some strap wrenches. They work wonders.
It was somewhat of a tough pill to swallow the cost of this unit. After all, it ended up costing MORE than the cost of the AT8RC. However, it makes such a big difference in terms of automation and preciseness of focus that I really do think it is worth the cost.
I did have an addition problem with the focuser. Specifically I had a problem with the threaded adapter. I was getting some internal reflections. I tracked it down to the adapter. I lined the inside of it with stick-on black velcro and the problem was completely and cheaply solved. I have talked to Ron at Moonlite about this problem. Hopefully they fix it, but if not, the velcro is an easy enough solution once you know that is where the problem lies.
OAG-8300 with STL faceplate - 795$:
I knew when I bought the AT8RC I was probably going to end up with an OAG. And I also knew it was probably going to be this one since it is well integrated with the camera and has a built in .7 reducer so that more guide stars are available. I wasn't happy about the price but it is what it is.
I don't really need the OAG for doing broadband work from my location. As mentioned, I can do five minute guided exposures without it which is about my ideal exposure time anyway for LRGB. However, I want to be able to take much longer subs for narrowband.
When researching this purchase, I found that it comes with 3 possible faceplates. By default it comes with a T-thread plate. But you can ask for either a SCT (2") or STL threaded faceplate instead. They actually recommend the STL faceplate even though it isn't the default. The reason is that for fast telescopes, the light cone to the pickoff prism can be partially obscured by the smaller faceplates. It is hard enough getting good guide stars in an OAG without losing additional light.
I decided to get the STL faceplate.
I have only had the OAG for a short time but so far it seems to be working out well. HOWEVER, the problem of finding guide stars is real. With my SBIG ST-i guider, I cannot count on their being a guide star that the automation will find after a meridian flip.
Since I need the OAG mostly for narrow band work and since narrow band targets tend to be in star rich environments, I could just continue to use my old Orion 50mm finder/guider for broadband LRGB targets. That is kind of inconvenient though since you would need to switch back and forth.
I'll go into all of this in more detail when I talk about the guide camera.
Custom adapter Astro-Physics CCDT67 to STL faceplate with 6.6mm spacing - 123$ after shipping:
If I was going to use the OAG-8300, I needed to figure out how to mate the STL faceplate with the 48mm threads of the Astro-Physics CCDT67. I also needed to get the distance correct so I would maintain the correct backfocus for the compression (and thus image scale) I wanted. That image scale was also important for good stars in the corners.
Unfortunately, adapters with those sorts of requirements don't come off the shelf. I needed to have an adapter made. I carefully figured the distances required and calculated I needed a spacer with the proper threads that would add 6.6mm of backfocus. Precise parts was able to machine exactly what I needed.
My calculations were pretty close. My old image scale was about .94 arc-seconds per/pixel. It is now around .93 arc-seconds/pixel.
By the way, I received an offer from a very kind Cloudy Nighter to machine this part for considerably less. I ended up using Precise Parts because I just didn't know how to specify the part that I needed. For example if the threading into the STL piece went too deep it would hit the pickoff mirror and if it wasn't deep enough, it would have much grab on the threads. With precise parts, they have a database of this stuff, and an easy web tool that you use to order what you need. They get all those specs right even though I still don't know what they are! That distance threading into the STL plate on the OAG-8300 was precisely the right thickness.
Note: I have since tried adding another 6.4mm of spacing using a Blue Fireball 2" Spacer Ring with 0.25" Extension # S-2A (14.95$). This changes my arc-seconds/pixel to .955. Richard Flynn was trying to optimize the spacing for the CCDT67 and AT8RC and came to the conclusion that somewhat more compression than I was using was optimal. Stars were improved for him (and they were already pretty good). The jury is still out whether this is an improvement or not on my system.
My Original Guiding System:
SBIG ST-i color - 595$ (This is up in price from when I bought it. I paid 495$)
Orion Deluxe Mini 50mm Guide Scope with Helical Focuser - 169.99$
Orion 1.25" Extension Tube - 21.99$ (necessary to get the guide camera in focus).
This setup is quite sensitive. It pulls in stars quite well. The only problem with it is the differential flexure between the guide scope and the main scope. In the case of my Celestron C8 that was because the mirror in the C8 flops around. In the case of the AT8RC it is because of the way the focuser hangs off the primary mirror cell. Still I was always able to take at least 5m exposures with acceptable star shapes. (I've gotten compliments on my nice round stars using this setup).
I've also used this combination with focal lengths of as much as 2000mm. In good seeing, it is capable of guiding to <.5 arc-seconds RMS in each axis.
However, now that I have moved over to the OAG-8300m I have replaced the SBIG ST-i. First of all, the color version while sensitive is not quite as sensitive as the monochrome versions. I bought the color version to save 100$ and with the thought I would use it as a planetary camera. I haven't much and there are very good planetary cameras out there at less cost.
My Current Guide Camera:
QHY5L-II Mono - 320$
I really debated whether to replace the SBIG ST-i color with a 1/2" chip (thus having more stars to choose from) or a more sensitive chip. I ended up going with a more sensitive chip. When I first got this I tested it against the SBIG ST-i color and found I was getting signal/noise ratios about 3x better. I was also finding fainter stars. I'm much happier with this as my guide camera. I rarely have to move the scope to pick up a guide star, and on the rare occasions it happens, it is normally just a minor nudge.
The QE on this camera is as high as 74%.
Balance:
ADM DV Series Counterweight - 59$
http://admaccessories.com/DV_Series_Counterweight.htm
Extra 11 lb Counterweight for Atlas - 39.99$
http://www.telescope.com/11lb-Counterweight-for-Atlas-amp-Sirius-Mounts/p/986...
To take good astrophotography pictures, you must be able to balance the scope well in both declination and RA. Notice that balancing it well does NOT mean it is in perfect balance. Things need to balance somewhat East heavy. The outfit also needs to balance either somewhat front or back heavy on the declination axis. I prefer front heavy.
My system as above is quite heavy and requires either an extension bar for the RA counterweights or an extra weight. I prefer an extra weight (you get fewer vibrations that way because of the shorter moment arm).
It is also quite back heavy because of the heavy camera, the primary mirror, and the heavy focuser. The ADM counterweight system for the declination axis works great. I have an extra weight for it but don't need it.
From experience, I have found that bad declination balance is actually capable of ruining RA tracking as well. 59$ to get it right is well worth it.
Also notice that the version I have is the DV series. ADM makes various versions of many of their products. Some mount only on Vixen plates. Some mount only on Losmandy Plates. However, they have this DV series that can mount on either. As I have been picking up accessories from them, I make sure I get the DV series since it is more versatile.
Dew Prevention:
Where I live humidity can get quite high so some kind of dew prevention is an excellent idea. My dew prevention is made up of 3 parts: a power supply, a controller, and a dew strip.
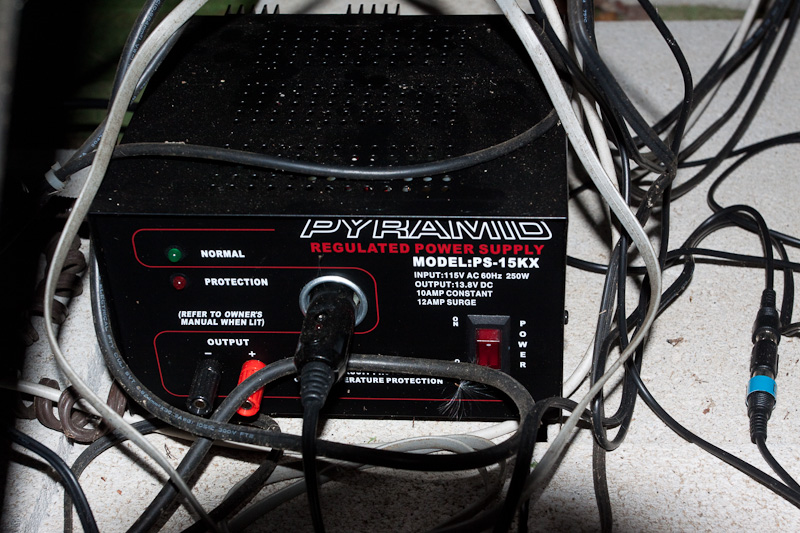
Power Supply: Pyramid PS15KX 10A 13.8-Volt Power Supply with Cigarette Lighter Adapter - 59.37$
Where I live humidity can get quite high so some kind of dew prevention is an excellent idea. My dew prevention is made up of 3 parts: a power supply, a controller, and a dew strip.
Power Supply: Pyramid PS15KX 10A 13.8-Volt Power Supply with Cigarette Lighter Adapter - 59.37$
Dew Controller: Kendrick SDCC Two channel/four output standard dew heater controller - 114$
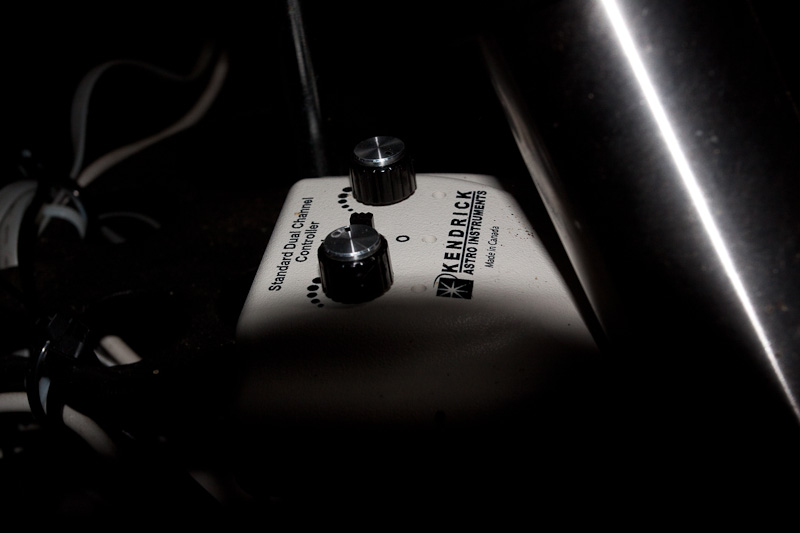
Dew Strip: Dew-Not Dew Remover model # DN09 - 44.75$
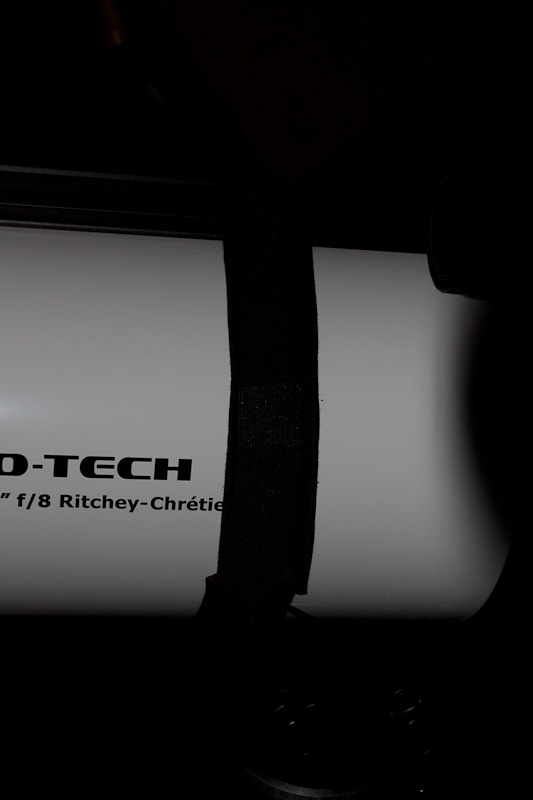
Note how the dew strip simply wraps over the top dovetail bar. On the bottom, it passes between the dovetail bar and the telescope.
Some Later Additions:
The description above is a good representation of my system throughout most of 2014. However, I have recently changed things up a bit.
Here is an image showing the two of the key new elements:
The description above is a good representation of my system throughout most of 2014. However, I have recently changed things up a bit.
Here is an image showing the two of the key new elements:
Stellarvue SV80ST-25SV - 1217.14$
While I really like my AT8RC, it is not a wide field scope. This is now my wide field solution. While there are cheaper alternatives in the 80mm triple apo market, what I really like about this scope is it comes with rings. It also has a very nice stock rack and pinion focuser. It all fits into a very nice carrying case. Part of the purchase price mentioned is for the Losmandy dovetail plate I also purchased from Stellarvue. To get this price, I did need to join the Stellarvue club (18$). I made up way more than the price of the club membership with the reduced pricing on the scope.
Initially, when I got the Stellarvue, I was getting elongated stars. Investigation of the problem showed it was due to pinched optics. Stellarvue paid for the shipping back and replaced the lens with a VERY nice copy. While there, they also replaced the focuser since it wasn't quite as smooth as they wanted (I had been satisfied with the original).
This is part of why it is worthwhile dealing with some of the better companies out there. Any equipment can develop problems. The key with the good companies is how they support you after the sale.
Teleskop Service TS Flat 2 - 200.23 Euros
Refractors usually need field flatteners unless they are one of the special designs that have them built in. I wanted a field flattener with LOTS of backfocus with minimal vignetting. The TS Flat 2 fits the bill. This way I can continue to use my OAG-8300 with the refractor. With many of the available flatteners, I would have needed to remove it.
Paramount MyT - 6000$ and Paramount MyT Tripod -1350$
A good mount is the key to successful astrophotography. While my Orion Atlas did yeoman's duty, if I wanted to upgrade my equipment to be remote capable, it needed to be replaced. While 7350$ is a lot of $$$ (and shipping and another 10lb counter weight were an additional roughly 350$), it IS remote capable and has many other nice capabilities as well. Among the things that make it so nice for remote imaging are:
o It has a homing sensor that allows the mount to return to a known physical location in space. For those who have ever had their mount get lost, they will appreciate what a big deal this is.
o It does not have clutches that can slip.
o It has current limiting for the motors so that if you have a pier crash or the motors stall for any other reason, you don't burn them up.
Other really nice capabilities include:
o Low periodic error. They specify 10 arc-seconds. Mine measured at slightly over 3 arc-seconds.
o It comes with TheSkyX, which is a really nice planetarium and telescope control system.
o It likes neutral balance, which means it images just as well after a meridian flip as before.
o It can carry up to 50 lbs of instrumentation (and that is an imaging specification).
o It is quite portable for such a capable mount.
o Through the mount cabling.
o Very smooth altitude and azimuth adjusters that are indexed.
While I did not buy it thinking my stars would be tighter, that is also turning out to be the case. Tighter stars means finer detail.
