Quantum Jumps:
I have been imaging seriously since the beginning of 2013 and over that time, my imaging has improved tremendously. There are lots of reasons for that, and a large part of it has been the help of the folks over on Cloudy Nights. That progression has been anything but a slow continuous improvement between then and now. Instead it has been marked by jumps followed by plateaus. I thought it might be helpful to others to list what those jumps were, and why they happened.
Many of those changes were related to equipment. There are some very poor imagers who have very fine equipment. But poor equipment WILL effectively impose a limit on what is possible. (It will also increase your frustration level, but that is a different blog entry).
So here is what my progression has looked like in the order they occurred (as best I recall):
1) Ground State: Unmodified Canon 50d, Celestron Powerstar III C8, Celestron f/6.3 reducer flattener, on a Celestron CG-5 mount, controlled and processed using Nebulosity and Photoshop.
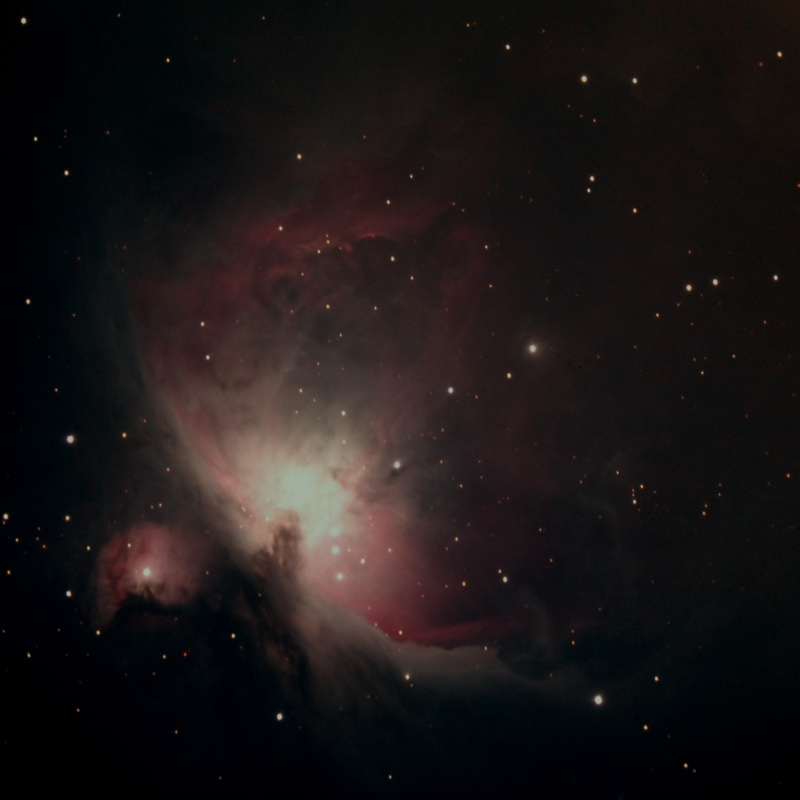
Messier 42 and 43, February 21st, 2013
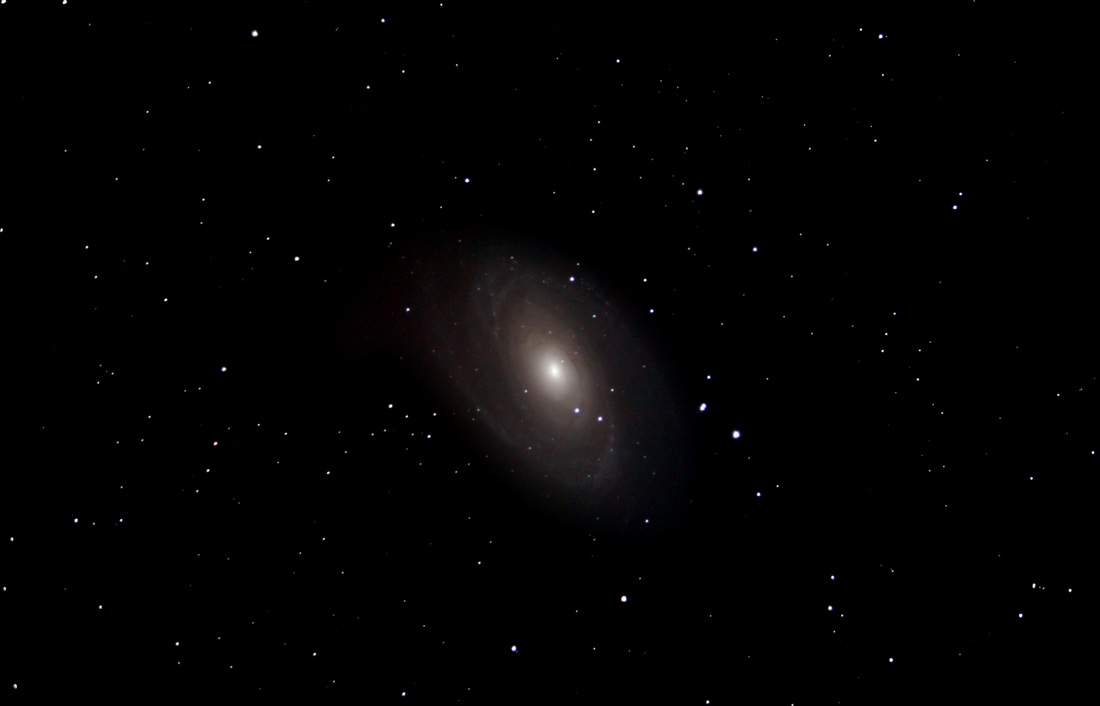
Messier 81, March 3rd, 2013
These images of Messier 81 and Messier 42/43 were about as good as it got.
2) Switched out my Canon 50d for a STF-8300m with Baader LRGB and Ha filters. This was a big leap. The addition of set point cooling and mono imaging made an immediate improvement. This was one of the biggest jumps but also by far the most expensive. It was also a complicated jump because processing the different color channels and combining them required learning new processing techniques.
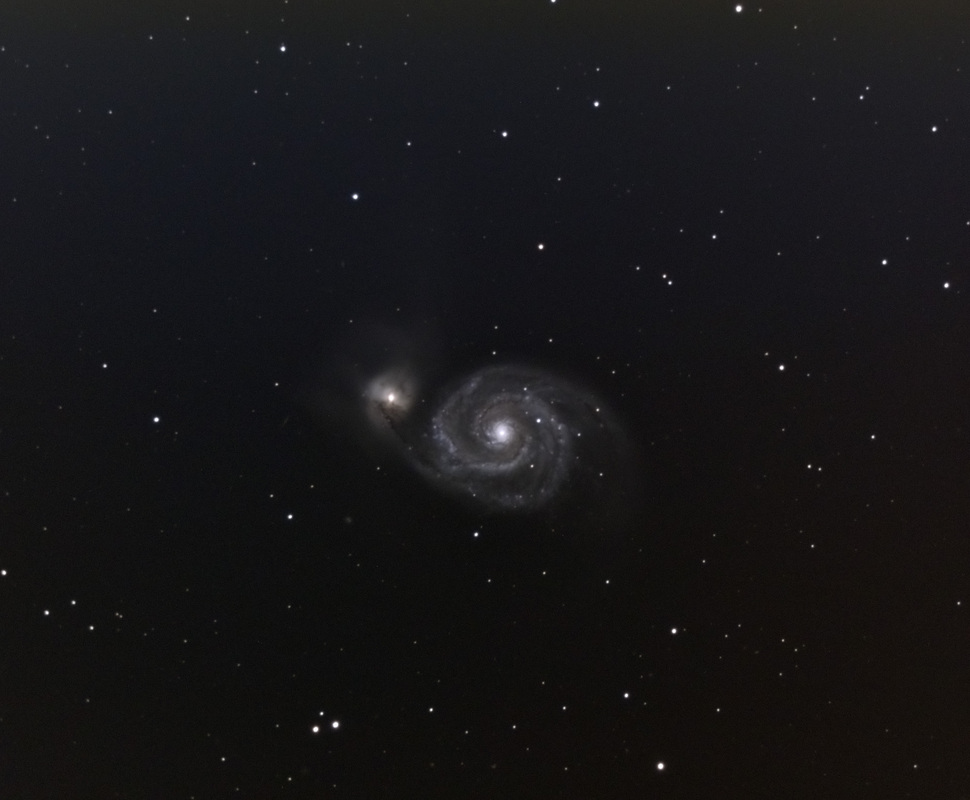
First Light with My STF-8300m. Messier 51, March 19th, 2013
3) Using a Guide Camera and Scope (SBIG ST-i color with a Orion 50mm guide scope with helical focuser): Although I purchased this slightly before I got the STF-8300m I started really using it afterwards. My typical exposure times without it were 30s. This was no where near my sky limited exposure (around 5m with a L filter). Going longer allowed me to get much less noisy images that went deeper.
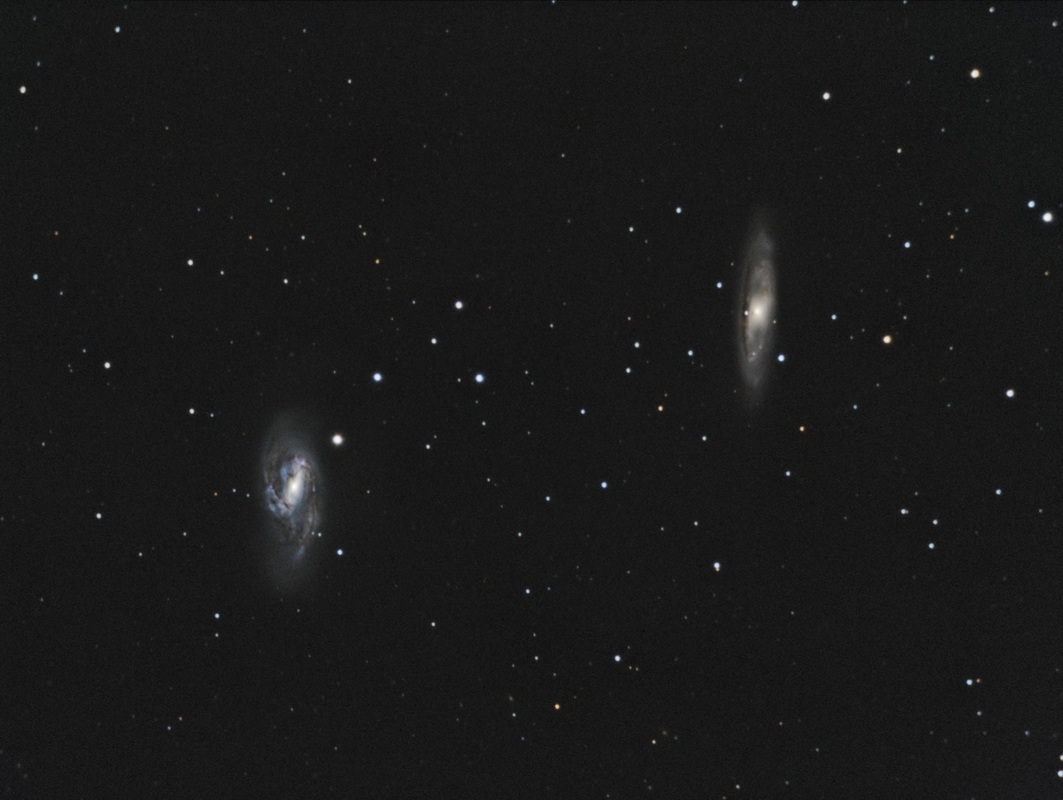
Messier 66 (Left) and Messier 65 (Right) Using 5m Subs, March 30th, 2013
4) Switched to PixInsight for my Post Processing: This was a little daunting at first since PixInsight isn't the easiest piece of software to learn. However, it IS very powerful. In particular, I hated stacking in Nebulosity since it was by and large a manual affair and results for me were at best inconsistent. The DPP module was a powerful but rather hit and miss way of stretching the image as well. Plus PixInsight had many capabilities that Nebulosity simply did not have. I got my copy of PixInsight in May, 2013 although I was using a trial version in April.
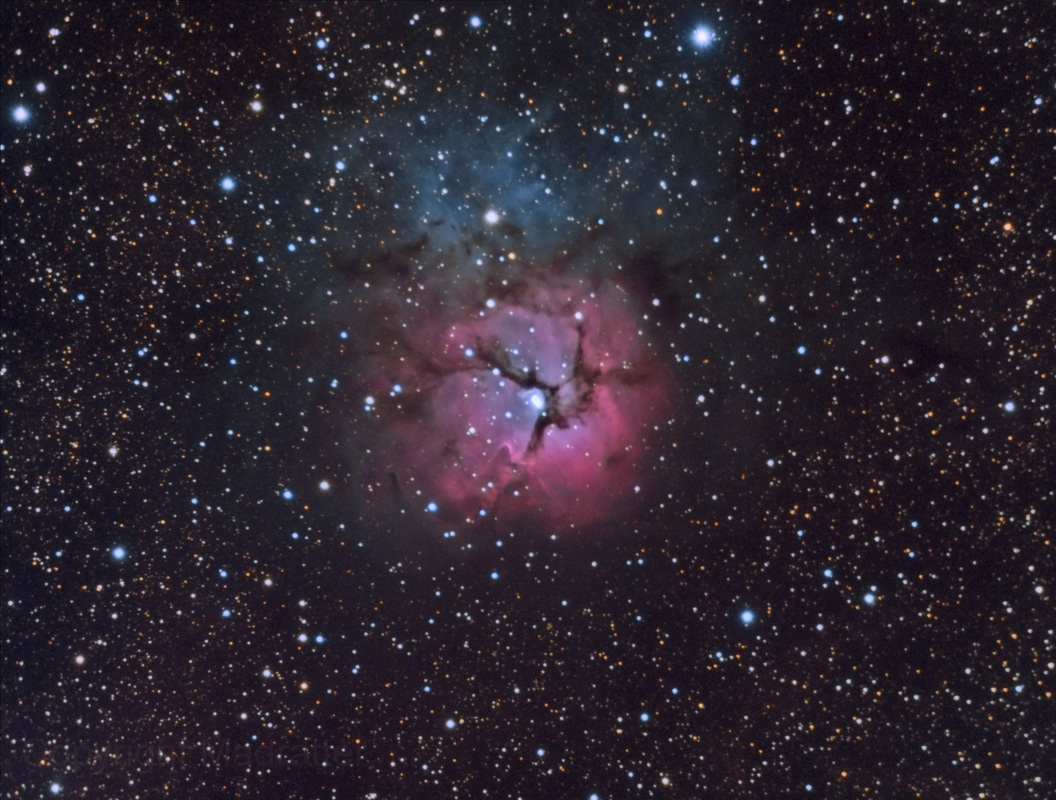
Messier 20, Processed Using PixInsight, April 5th, 2013
5) Switching Out My Celestron CG-5 Mount for an Orion Atlas: The Celestron CG-5 mount, while wonderful visually, was a source of constant frustration for imaging. In particular, I was having trouble guiding in the declination axis. I knew that in order to take things to the next level, I was going to need a mount that had roller bearings on the declination axis. Dropping 1500$ on a mount was a tough pill to swallow, since with enough persistance, I could get at least somewhat acceptable results out of the CG-5. However, it turned out to be money very well spent. My guiding improved immediately. That meant far fewer subs tossed in the trash. It also meant I got to use EQASCOM together with EQMOD. They are an excellent way to control the mount. Experienced astrophotographers will often tell you that the mount is at least as important as the scope. They are correct.
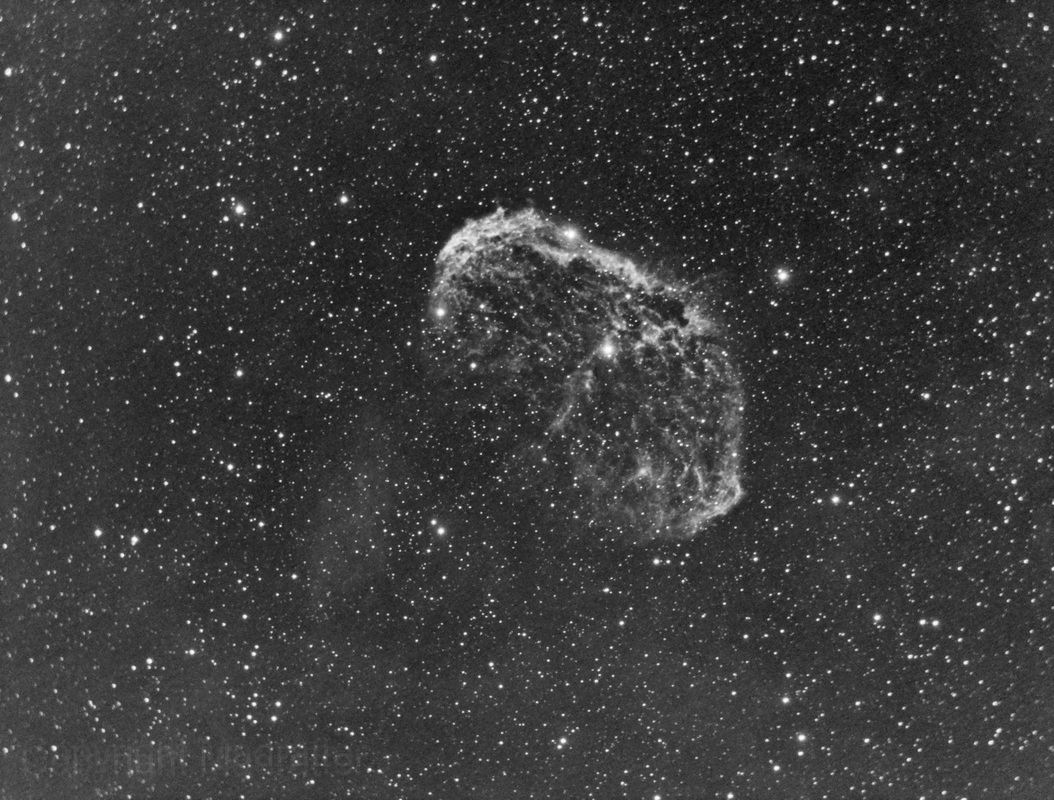
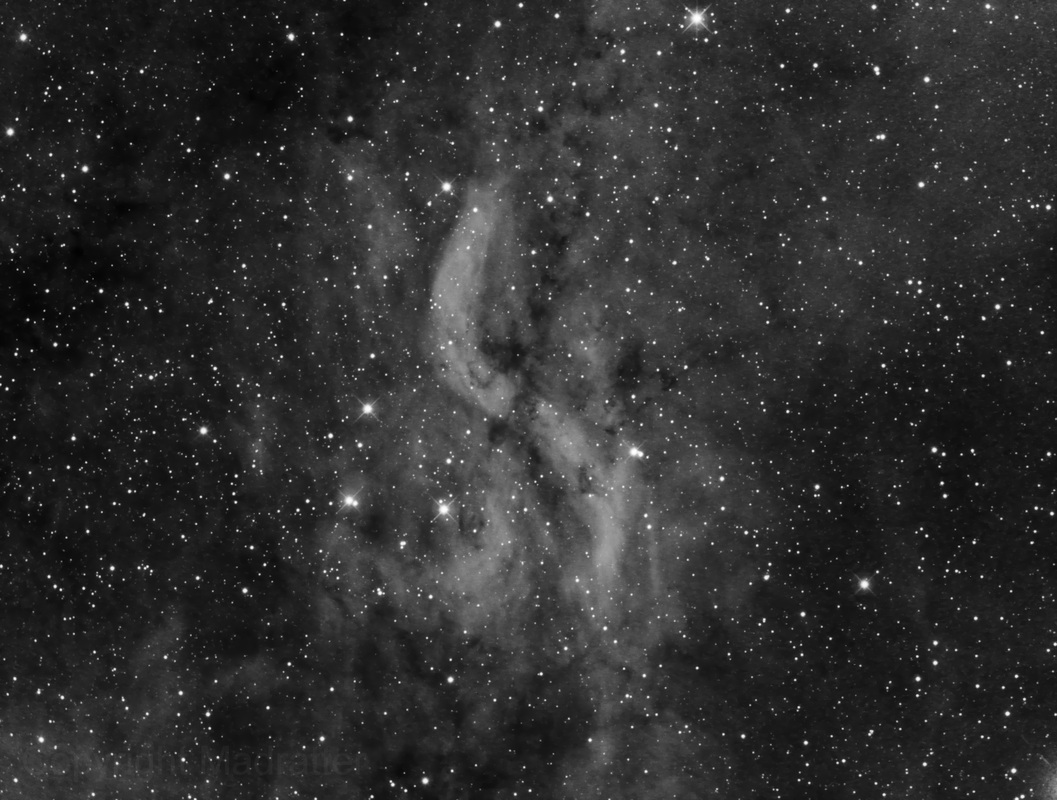
The Crescent Nebula, NGC 6888, Shooting 10m Ha subs with the Orion Atlas, June 18th, 2013
6) Switching Out the Celestron Powerstar III C8 for an Astro-Tech 8" RC (Steel Tube): The Celestron Powerstar III C8 served me well getting started, but it had a number of annoying issues that I was eager to get corrected. The design of the focus mechanism allows the mirror to flop around, this causes issues with it holding focus, especially when a meridian flip occurs. Also, the f/6.3 focal reducer/corrector simply did not completely do the job and star shapes were pretty bad in the corners, and for that matter well away from the corners. Perhaps there is a spacing that completely eliminates this problem but I never found it. I knew I want to replace it with something that would give me somewhere in the ballpark of 1"/pixel image scale with my STF-8300m. I was strongly considering a Mak-Newt but the one I really wanted was not available in the USA. One day on Astrobin, I happened across an image taken with the AT8RC paired together with the Astro-Physics CCDT67 reducer. When spaced at around .75 compression, it gave very nice star shapes. I had finally found what I was looking for.
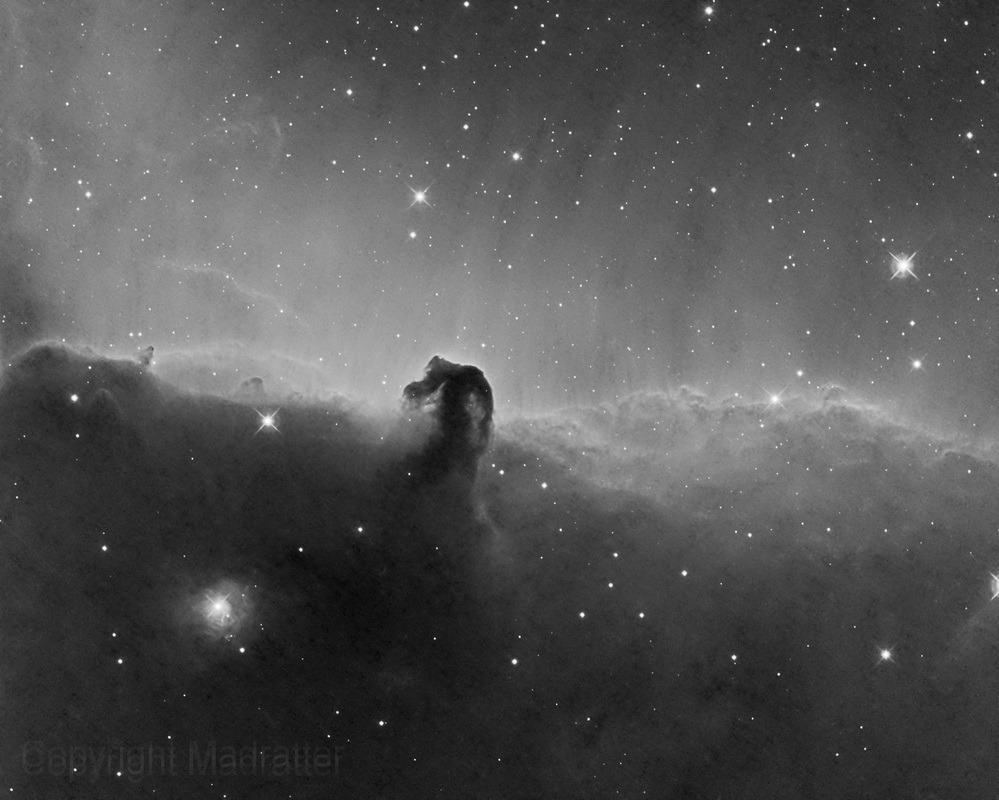
The Horsehead Nebula, Bernard 33, First Light Using the AT8RC with CCDT67, October 3rd, 2013
7) Automated Focusing with My Moonlite CSL Focuser: I wasn't sure just how big a change automated focusing was going to make in my images, but I was sure that is was going to help me grab more sleep. It turned out the difference in my images was quite noticeable with tighter stars (lower FWHM). Part of this was because I worked out the filter offsets and would refocus between filters. Before, I focused for Luminosity, and let the "parfocal" filters fall where they would. Also, I didn't refocus very often since I often wanted to hit the sack, plus I had to move my carcass back outside. After a fair amount of research, I settled on my Moonlite focuser, and after some initial teething problems (user error and some reflection problems in the one adapter), the system worked great.
The focuser was purchased in January of 2014.
The focuser was purchased in January of 2014.
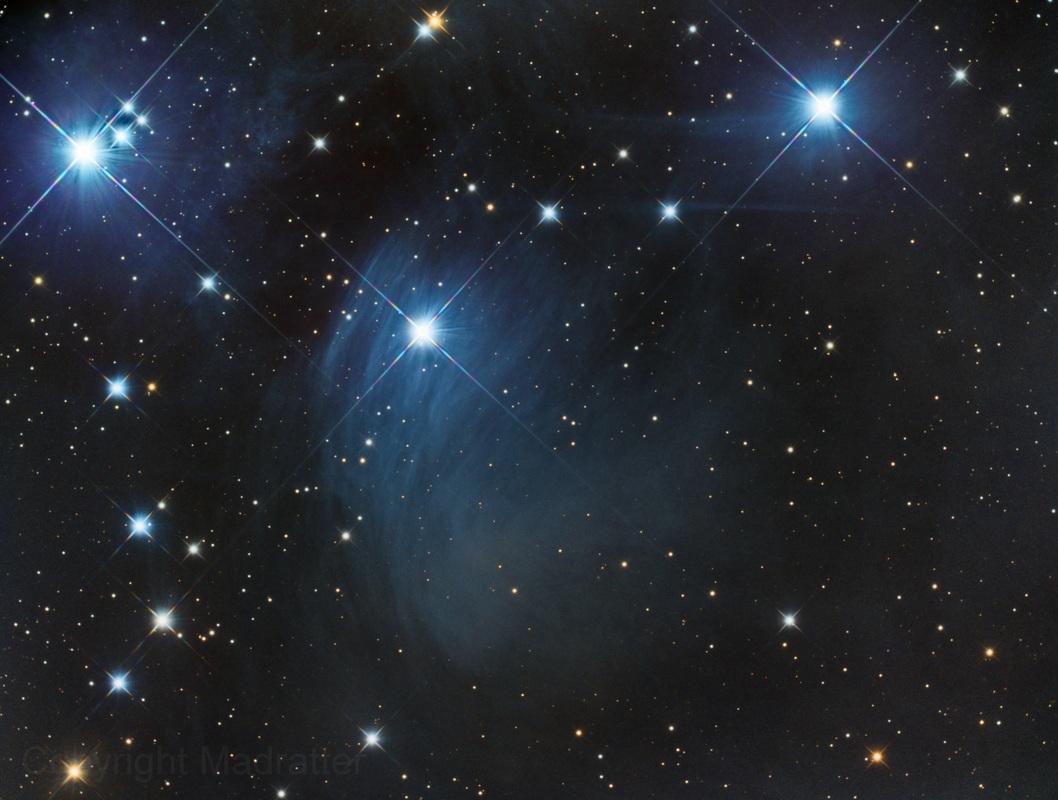
Detail from Messier 45 Showing the Merope Nebula (NGC 1435), Imaged Using the Moonlite CSL Focuser with Stepper Motor and Controller, January 23rd, 2014
8) Doing Saturation While Linear: Early on, I was very unhappy with the color rendition I was getting in my images and I set out to figure out why. Eventually what I learned became an article, "Getting Good Color" that can be found on this site. It is hard to put an exact date on this but many of the fundamentals had already been worked out for the Merope Nebula image above. The most important points were to make sure to do the saturation in the linear state, and not to overstretch the color channels. By April, I had become confident enough in my methods to commit them to that article.
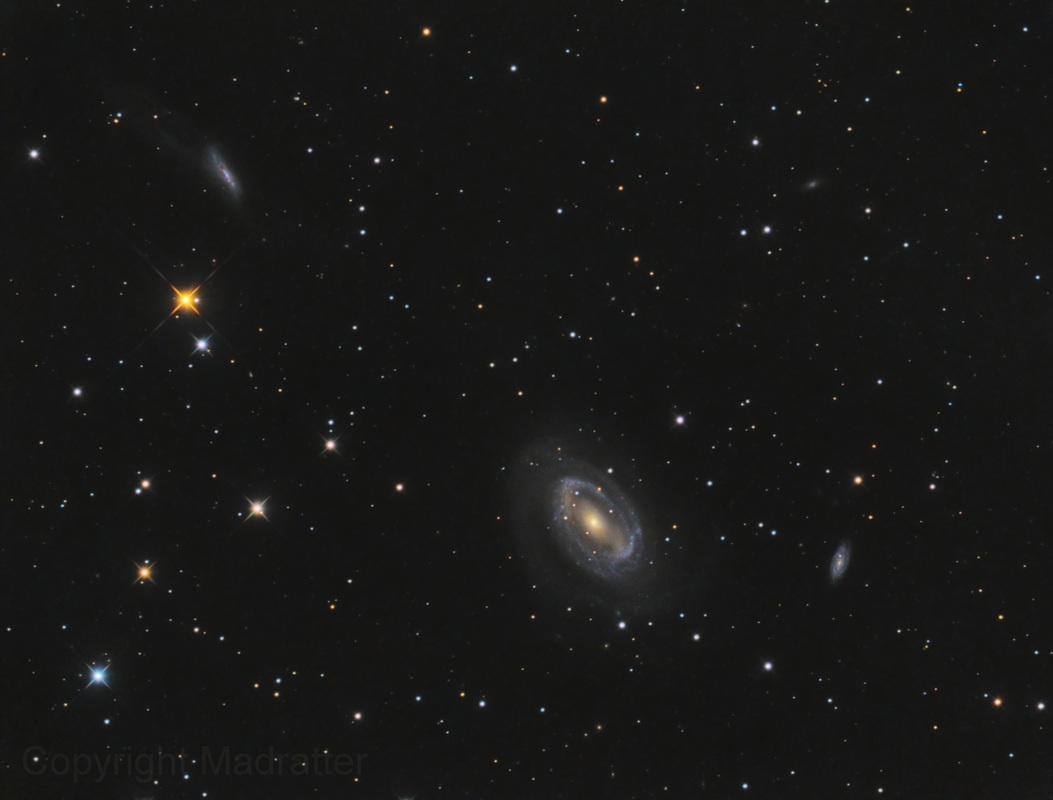
NGC 4725 and Friends, Processed Using the Techniques In "Getting Good Color", April 1st, 2014
9) Using an Off Axis Guider: Flexure between my guide scope and my AT8RC was limited the length of my subs. Since I knew I wanted to get into narrow band imaging, I knew that long subs were going to be a necessity. Ten minute subs were occasionally possible, but anything long was pretty much out. I got the OAG-8300 for my camera in late March. I soon found that my existing guide camera, a SBIG ST-i color, was not as sensitive as I wanted for an OAG. I purchased a QHY5L-II mono to use instead. After some initial problems (occasional freezing of PHD2 using the QHY5L-II mono), it turned out to be a very nice combination. My stars got tighter once again and long subs are now possible.
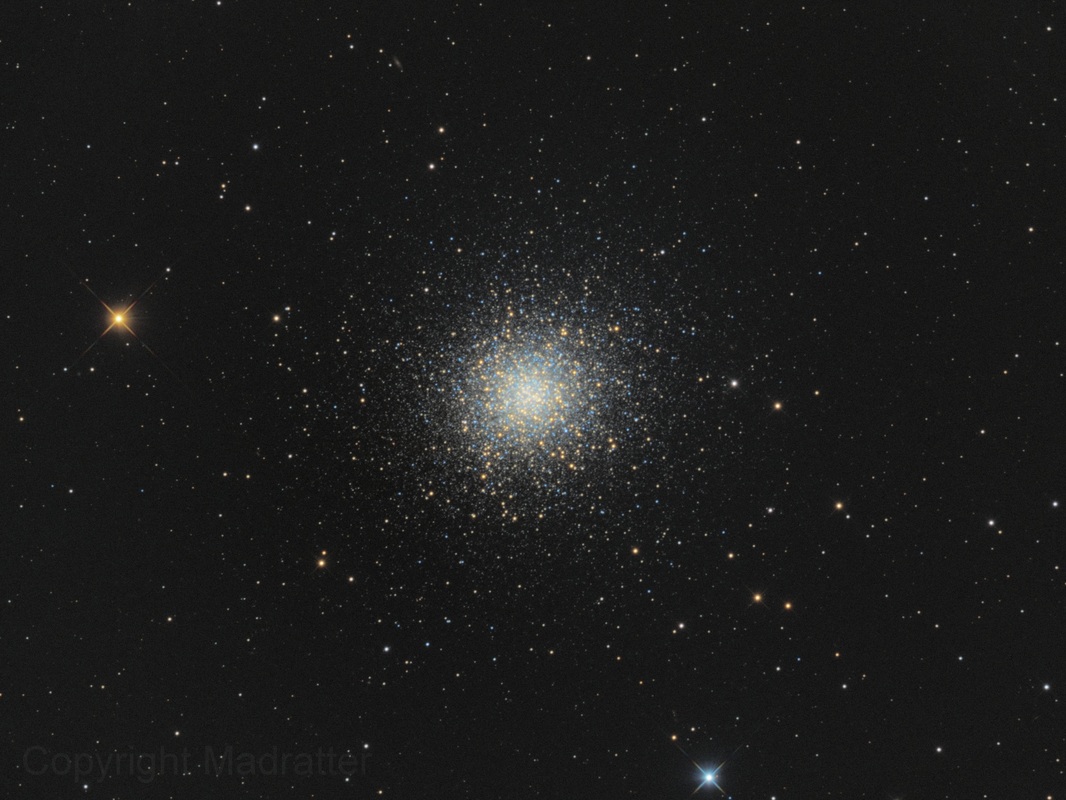
The Great Hercules Globular Cluster, Messier 13, Taken Using an OAG, April 16th, 2014
The Propeller Nebula, Simeis 57, Fifteen Minute Subs Using an OAG, June 5th, 2014
