Noise Reduction: MultiscaleLinearTransform in PixInsight
When I originally did my PixInsight tutorial, I used the TGVDenoise process for noise reduction. And I used that process after the data had been stretched. There are some theoretical reasons why doing noise reduction after the stretch (and indeed almost as the last step) is superior. However, In practice I have found that when using the tools in PixInsight, I get my best results when applying the noise reduction to the linear data. In particular, there is an orange peel effect that often is visible in images that were processed using TGVDenoise. While there are techniques to avoid that, I find them rather unsatisfactory for various reasons. As a result, I have switched over to using the MultiscaleLinearTransform (MLT) process in PixInsight.
Another very similar tool is MultiscaleMedianTransform (MMT). The use of the tools is very similar, and once you learn one or the other, you should be able to move between them. MultiscaleLinearTransform is actually two highly similar noise reduction techniques: Starlet transform, and MultiscaleLinearTransform. Starlet actually corresponds to the old tool, ATrousWaveletTransform.
My aim here is not to go into every possible setting. Instead, I just want to give you a solid start on using the tool. After learning the techniques here, you should be able to branch out to the other settings if so inclined.
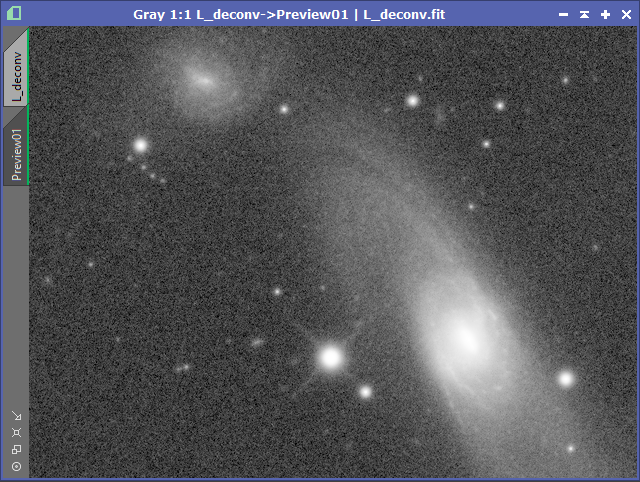
The first thing you should do is bring in your linear image and then give it a screen transformation (ctrl a). Then you want to define a preview area (alt n). Select the preview tab on the side of the image window to view the preview.
Another very similar tool is MultiscaleMedianTransform (MMT). The use of the tools is very similar, and once you learn one or the other, you should be able to move between them. MultiscaleLinearTransform is actually two highly similar noise reduction techniques: Starlet transform, and MultiscaleLinearTransform. Starlet actually corresponds to the old tool, ATrousWaveletTransform.
My aim here is not to go into every possible setting. Instead, I just want to give you a solid start on using the tool. After learning the techniques here, you should be able to branch out to the other settings if so inclined.
The first thing you should do is bring in your linear image and then give it a screen transformation (ctrl a). Then you want to define a preview area (alt n). Select the preview tab on the side of the image window to view the preview.
Next bring up the MultiscaleLinearTransform process. The first thing we are going to do is create a mask that will protect some of the image.
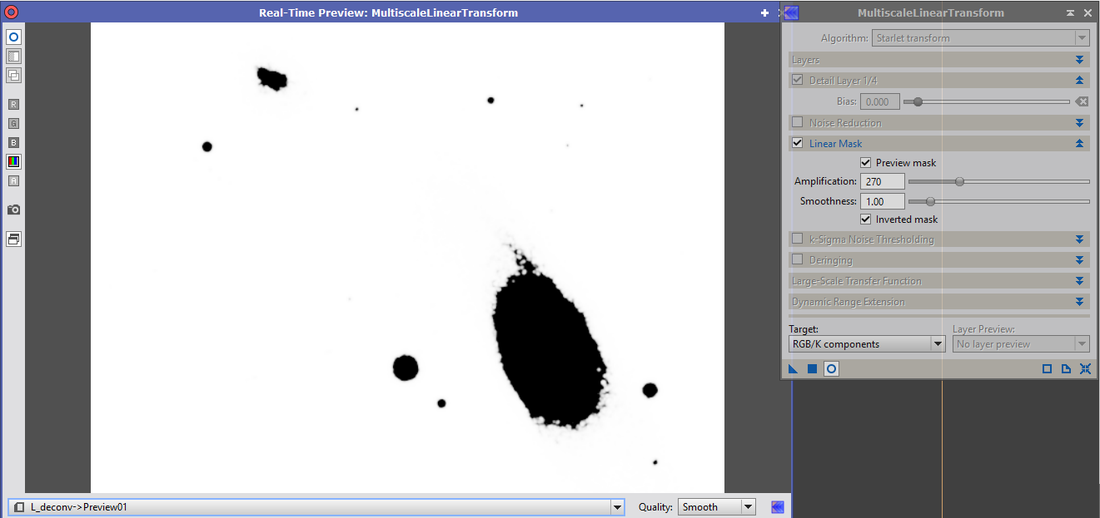
Make sure the linear mask check box is checked. Then select the Real-Time Preview button on the bottom (the circle). Select the Preview mask check box. Make sure the inverted mask check box is also checked.Then adjust the amplification button until you are masking out areas you want protected and only those areas you want protected. Also use the smoothness slider to adjust the mask. Here is the mask I created. After you have the settings the way you desire, uncheck the Preview mask check box.
Make sure the linear mask check box is checked. Then select the Real-Time Preview button on the bottom (the circle). Select the Preview mask check box. Make sure the inverted mask check box is also checked.Then adjust the amplification button until you are masking out areas you want protected and only those areas you want protected. Also use the smoothness slider to adjust the mask. Here is the mask I created. After you have the settings the way you desire, uncheck the Preview mask check box.
Now under layers, select the number of layers you want to use. The more layers you have, the more you can affect large scale structure. I typically use 5 or 6 layers. Here I will be using 5.
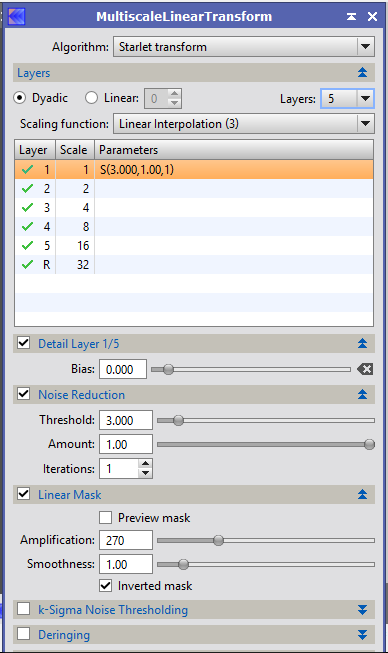
Now we are going to be adjusting the amount of noise reduction that occurs at each layer. Notice that each layer has a scale size associated with it. This is the size of structures being affected in pixels.
To see what is happening to the image, we will be looking at what happens in the Real-Time Preview window. You can click and unclick the Real-Time Preview button to see the image with and without the noise reduction being applied.
For each layer, we are going to be adjusting to values: a threshold and an amount. You can also play with the iterations value if you desire. In this tutorial I will be leaving iterations at 1.
As a general rule, we will be applying the most noise reduction layer 1 and then reducing the strength with each additional layer. The threshold is a sigma value and the amount controls how much noise reduction is actually applied. Play with those sliders to get a feel for how the image is affected. A good starting place for layer 1 is a threshold (sigma) of 3 and an amount of between 80-90.
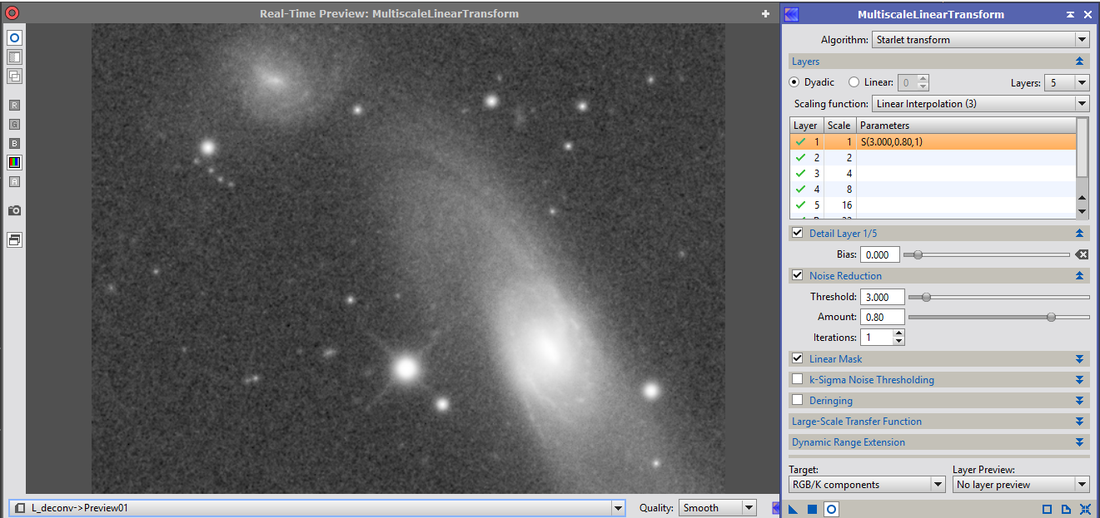
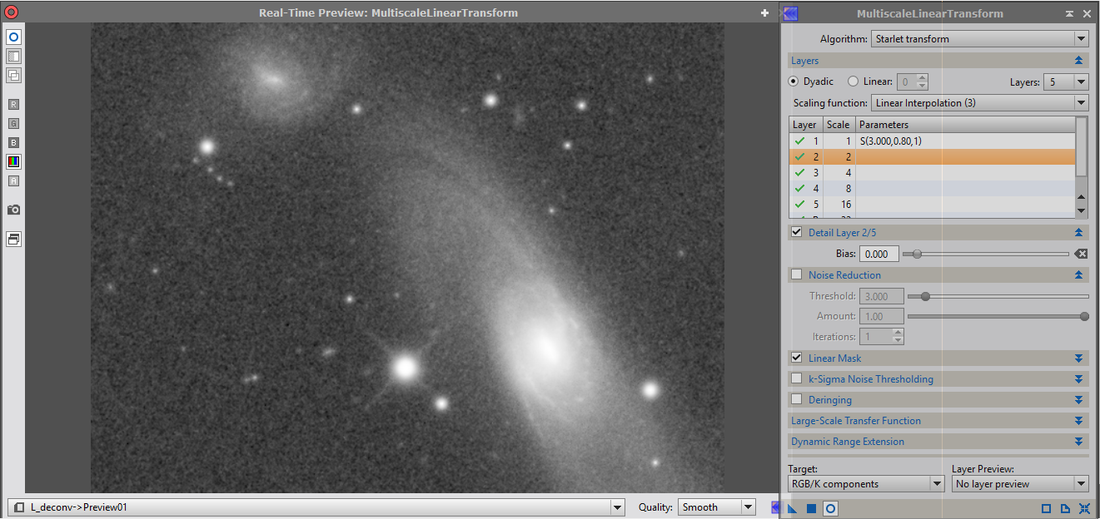
For each additional layer, it will be important to remember to set the noise reduction check box with that layer selected. Here we are doing this for layer 2. (It is shown as not checked - notice in the image after this one it IS checked.)
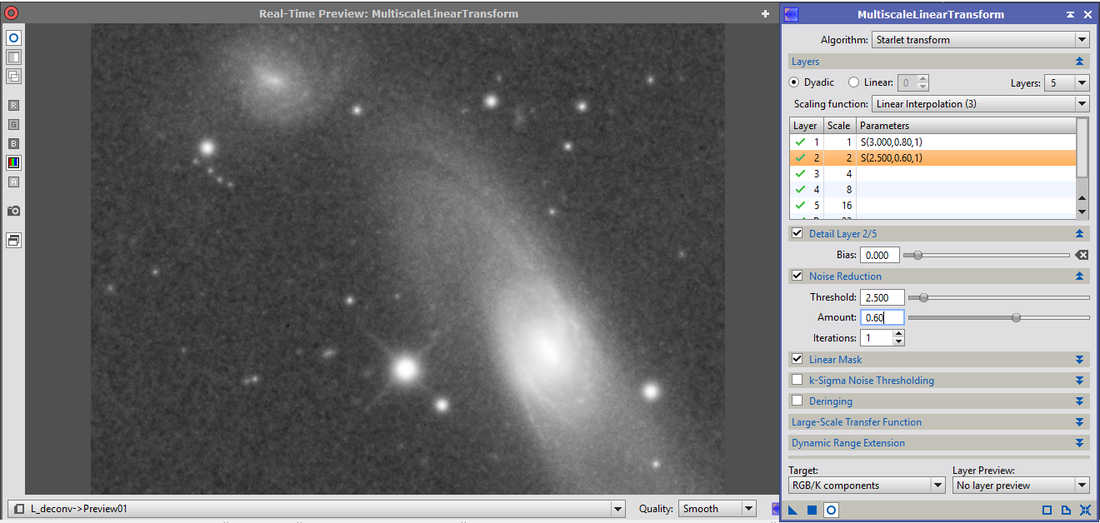
As mentioned, generally the threshold and amount values are then reduced for each additional layer compared to the layer before. Again, use the Real-Time preview to see what how you are affecting the image. Here are my settings for layer 2.
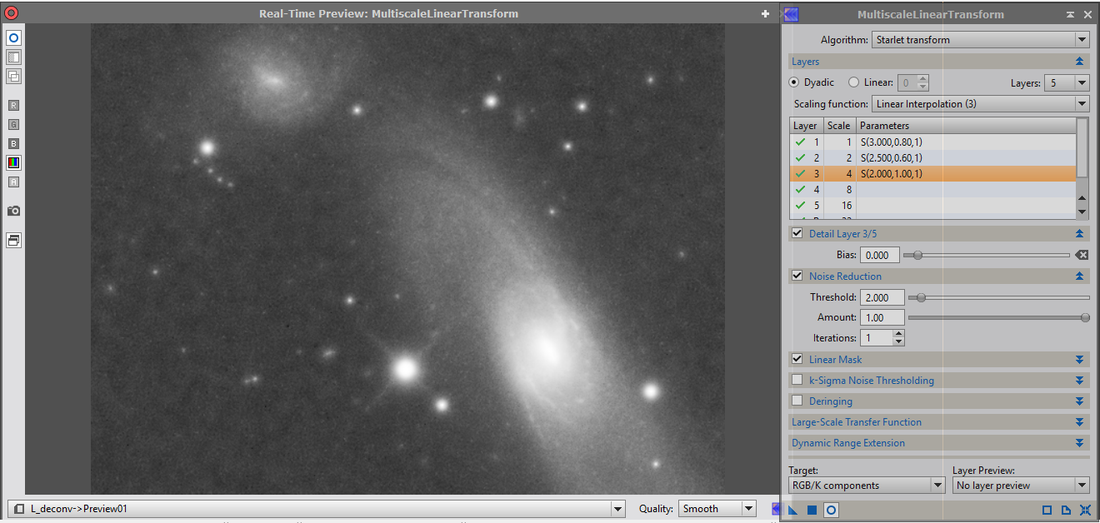
As you get up into the higher layers/scales, you may start to notice lumpiness or even ringing at high amounts. This is an example of that with layer 3. Make sure you bring the amount down to where that lumpiness disappears.
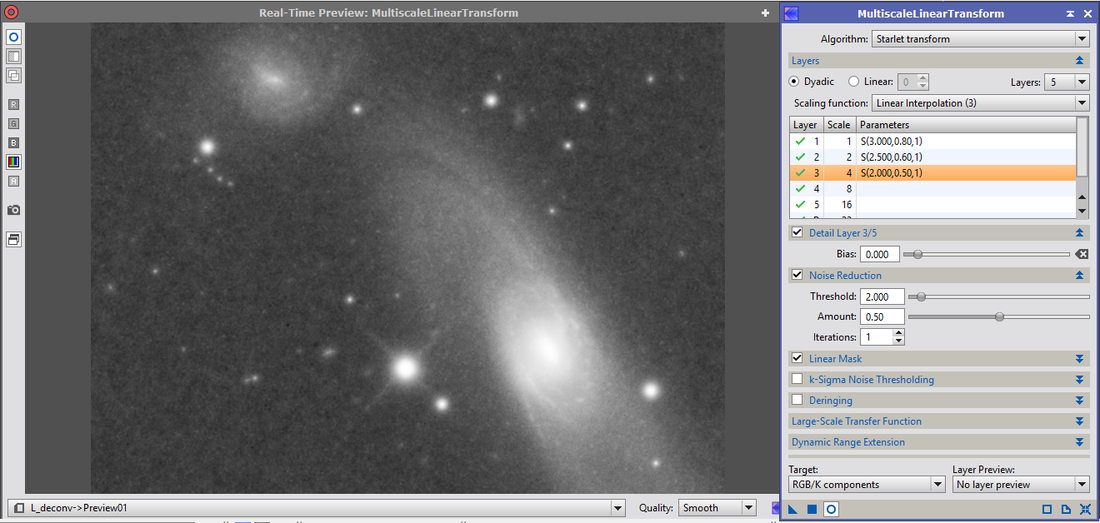
Here the amount value has been reduced until the lumpiness disappears.
With layer 4, again lumpiness shows at amount of 1.
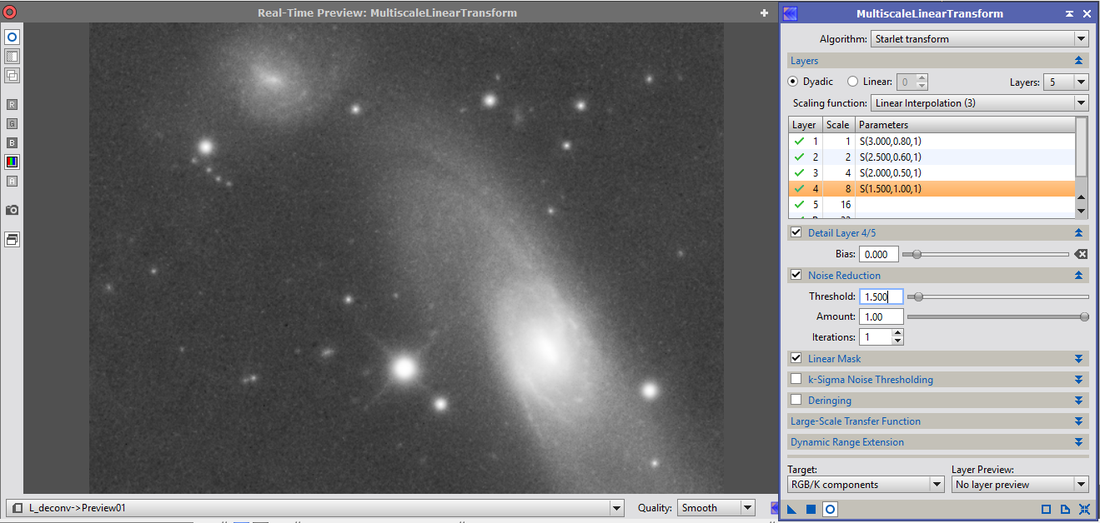
Here the amount slider has again been reduced. In practice, start at whatever amount you had for the previous layer and reduce from there. I am showing the amount of lumpiness at 1 to make more clear what I am talking about.

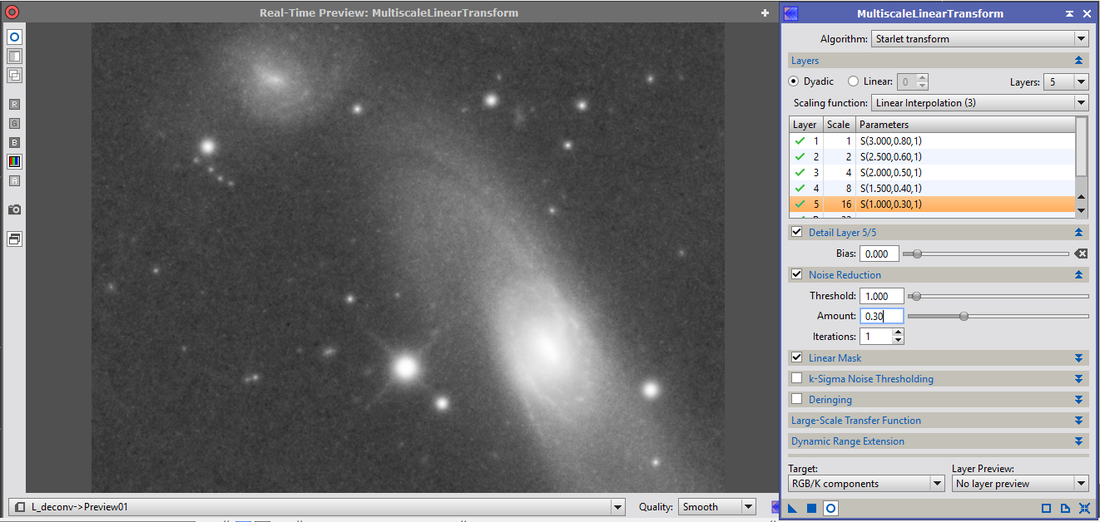
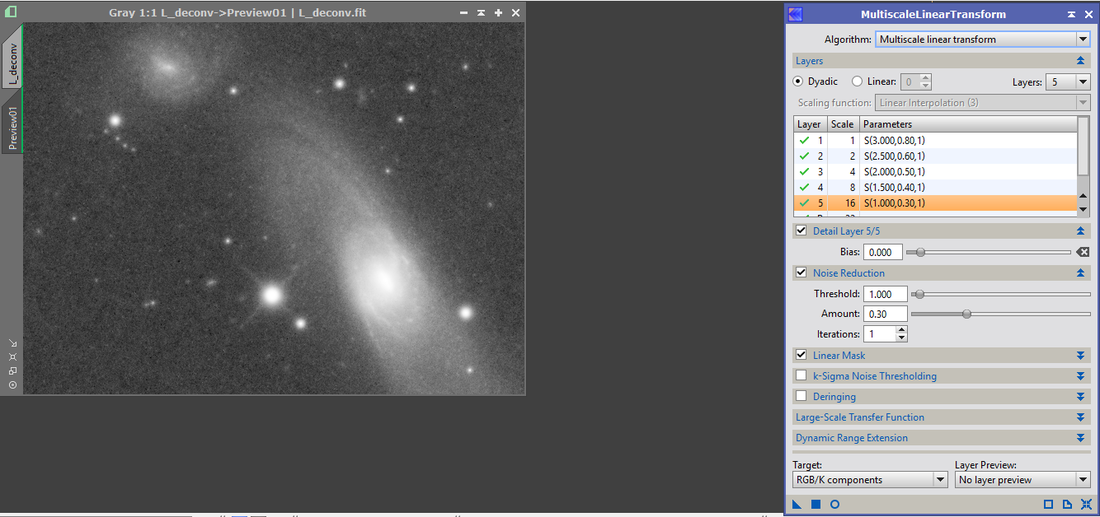
Here is layer 5. Notice that at each successive layer, both the threshold and the amount value have been reduced. You can experiment but this will be typical of the settings you want to use.
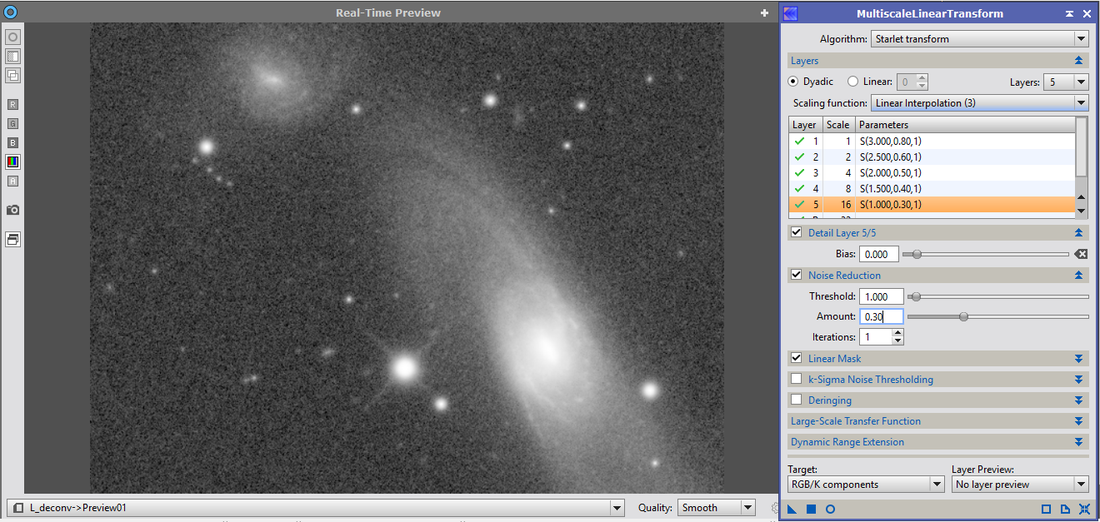
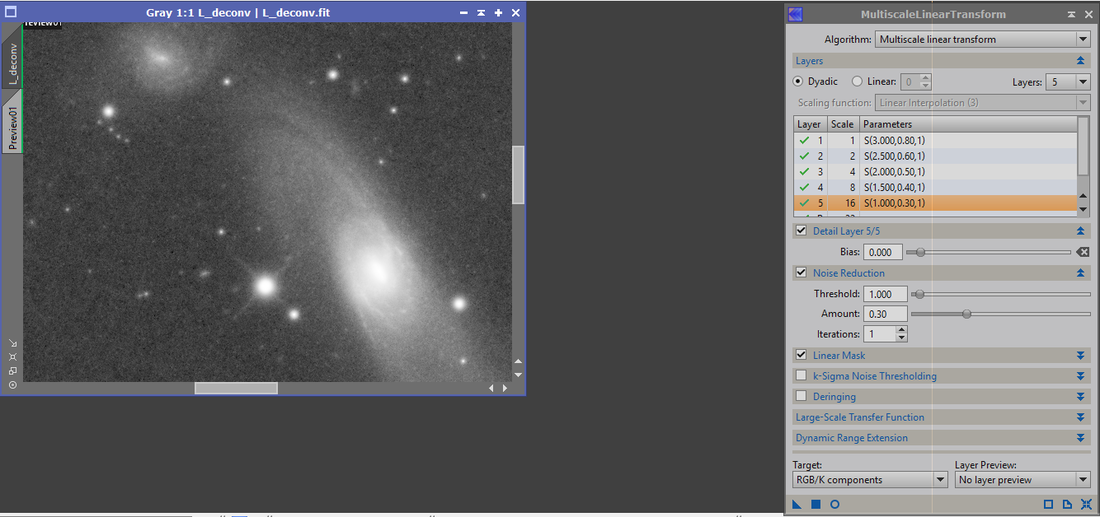
I have turned off the Real-Time preview so you can compare the results of the noise reduction with the original image.
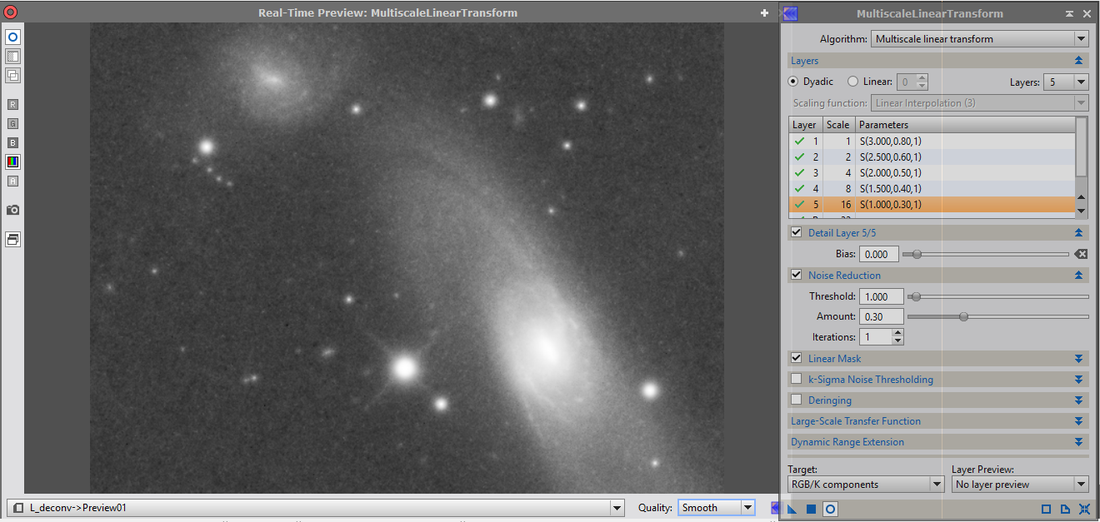
The astute reader may have noticed I talked about the Starlet and MultiscaleLinearTransform options. Up to now I have actually been using the Starlet transform setting. This is what things look like in the Real-Time preview with the MultiscaleLinearTransform setting. One advantage of the MultiscaleLinearTransform setting is you have more control over the scale of each layer.
Once you have your settings how you like them, get rid of the Real-Time Preview and apply the settings directly to the preview. You can do this by dragging the triangle in the lower left of the process over to the preview.
If you like what you see in the preview, then apply it to the actual image. Select the image tab on the left of the image window and drag the triangle on the lower left of the process to the main image.
Remember that noise reduction should be exactly that, noise reduction. It is not noise elimination. If you apply settings that are too strong, you will end up with a very artificial looking image. You will also end up eliminating much of the fine detail that you worked so hard to gather.
Remember that noise reduction should be exactly that, noise reduction. It is not noise elimination. If you apply settings that are too strong, you will end up with a very artificial looking image. You will also end up eliminating much of the fine detail that you worked so hard to gather.
If you try the MultiscaleMedianTransform process, the settings work much the same way. You will probably find that the threshold amounts that you use will be somewhat higher to achieve the same level of noise reduction given by the MultiscaleLinearTransform process.
