Deconvolution:
Next up will be deconvolution. This should be done while the data is still linear (unstretched). This is a good place to pause for a while.
Deconvolution is a way of tightening up the detail in your image. It can make stars smaller, and it can bring out detail in your images.
Perhaps the way to start is to show what happens if you actually use the defaults on an image. It is usually pretty dreadful, and will illustrate why we go to the trouble of all the steps that are about to occur.
If you have followed along, you might want to save your current results. I called mine L_dbe. I save as a 32 bit fit file. I actually save after every operation. There is actually a history explorer, but that won't help if the electric goes out.
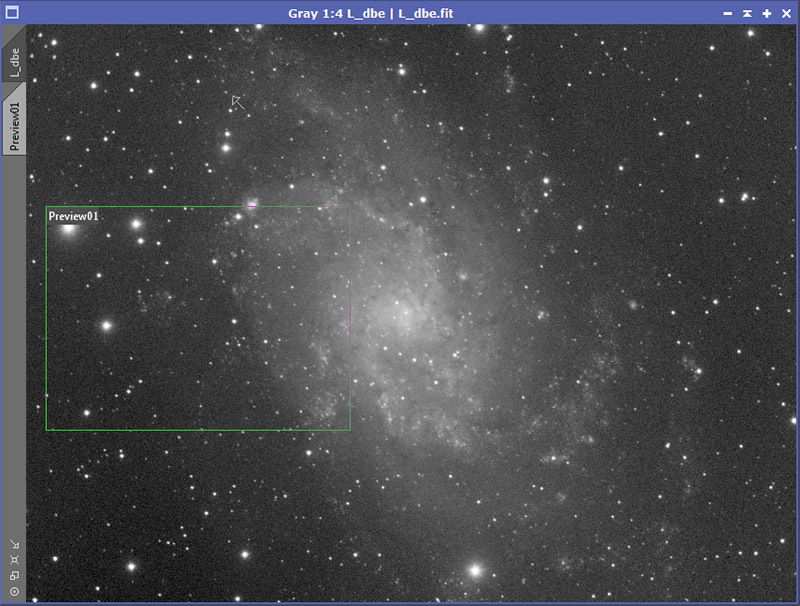
Bring up that image and use either [ctrl]a or STF (ScreenTransferFunction) to stretch it so you can see what is happening. Next we want to define a preview. This can be done by pressing [alt]n. Move the cursor to where you want to start. Then press and hold the left mouse button and drag to where you want the preview to end.
Previews are very useful in PixInsight and we will be using them from time to time for a number of purposes.
If successful, you will end up with something like this:
Next up will be deconvolution. This should be done while the data is still linear (unstretched). This is a good place to pause for a while.
Deconvolution is a way of tightening up the detail in your image. It can make stars smaller, and it can bring out detail in your images.
Perhaps the way to start is to show what happens if you actually use the defaults on an image. It is usually pretty dreadful, and will illustrate why we go to the trouble of all the steps that are about to occur.
If you have followed along, you might want to save your current results. I called mine L_dbe. I save as a 32 bit fit file. I actually save after every operation. There is actually a history explorer, but that won't help if the electric goes out.
Bring up that image and use either [ctrl]a or STF (ScreenTransferFunction) to stretch it so you can see what is happening. Next we want to define a preview. This can be done by pressing [alt]n. Move the cursor to where you want to start. Then press and hold the left mouse button and drag to where you want the preview to end.
Previews are very useful in PixInsight and we will be using them from time to time for a number of purposes.
If successful, you will end up with something like this:
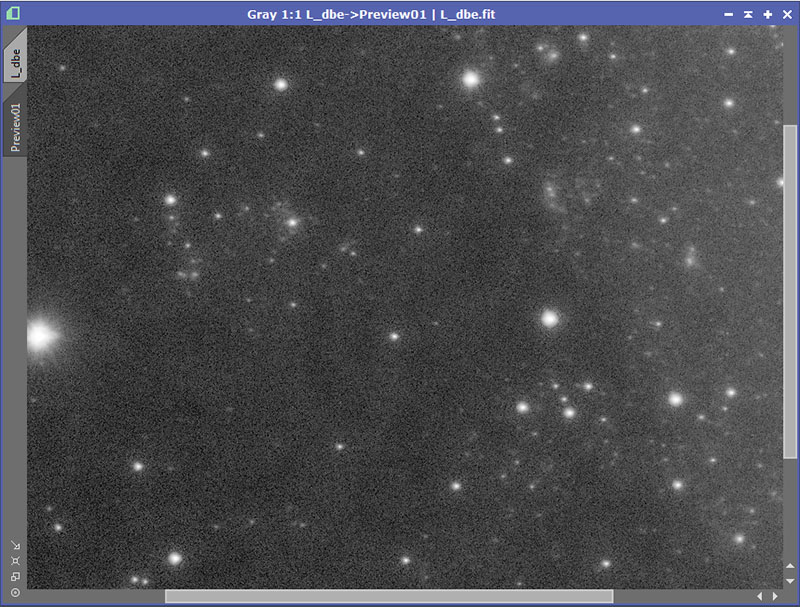
If you left click on the tab down the left side of the image that says Preview01, you should now see this:
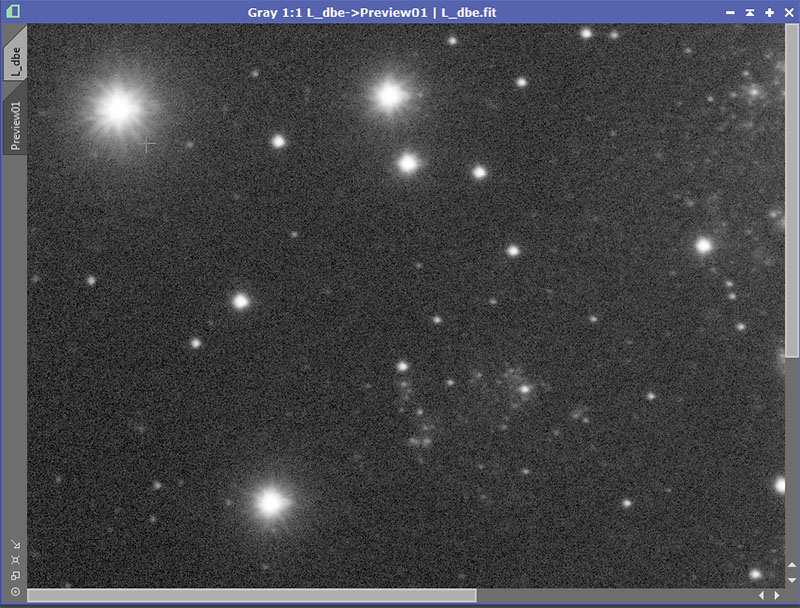
Notice I made my preview large enough that it does not all fit, when showing it at scale 1:1. (You can change the scale by using your middle mouse scroll wheel). However, we really want this at 1:1. We can either live with it this way, or using common windows methodology, we can grab the end of the frames and enlarge the window.
Now one of the things that makes previews useful, is that because they are not as big as the full image, computationally expensive processing can be tried out before committing the settings to the entire image.
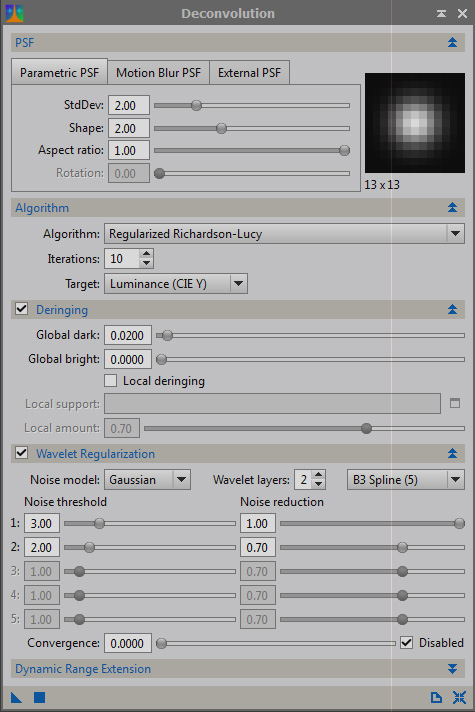
Bring up the deconvolution tool. I have opened mine up to also show the deringing parameters. We aren't currently using them but we will.
Now one of the things that makes previews useful, is that because they are not as big as the full image, computationally expensive processing can be tried out before committing the settings to the entire image.
Bring up the deconvolution tool. I have opened mine up to also show the deringing parameters. We aren't currently using them but we will.
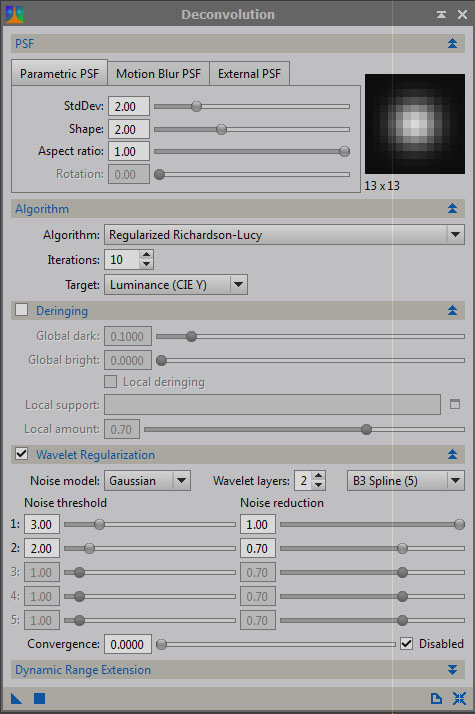
Now with the preview tab showing, drag the triangle in the lower left of the deconvolution parameters box over the preview image. This will apply those settings to the preview.
The result is this:
The result is this:
I think it is pretty obvious the result of using the defaults is horrid. There are now black rings around the stars. The bright stars have a bright ring around a brighter middle, and the noise in the image has been intensified.
You can get rid of these bad results by using [crtl][shift]z. Actually that will toggle the results so you can look at the before and after. Get rid of the bad results.
Do NOT try and get rid of the by hitting the back button in PixInsight. That will NOT accomplish what you want.
We can avoid some of the ringing artifacts by playing with the deringing parameters. Try these settings:
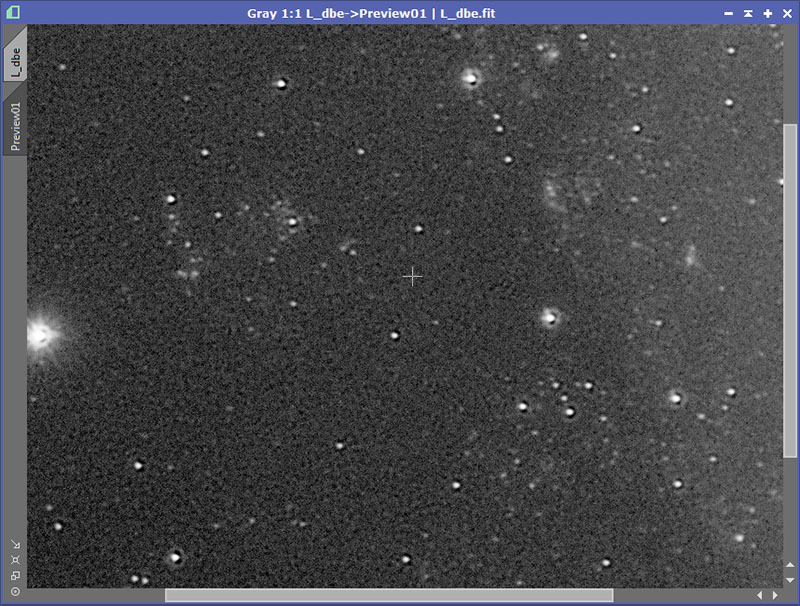
If you apply those parameters, you will get something like this:
Again, this is no good but at least we have gotten rid of the dark rings around the stars. But now there are all the unsightly bright lumps around stars and other places in the image. You can try to control them with the Global Bright Deringing parameter (try .01) but the results will still be worse than the original.
OK, that should give you some insight into why we are going to go through the steps that follow. To do Deconvolution properly, we are going to need three things first:
1) A Point Spread Function for stars in the image.
2) A star mask to help protect the brightest star from ringing artifacts.
3) A mask to protect the background areas in the image from being touched and made more noisy.
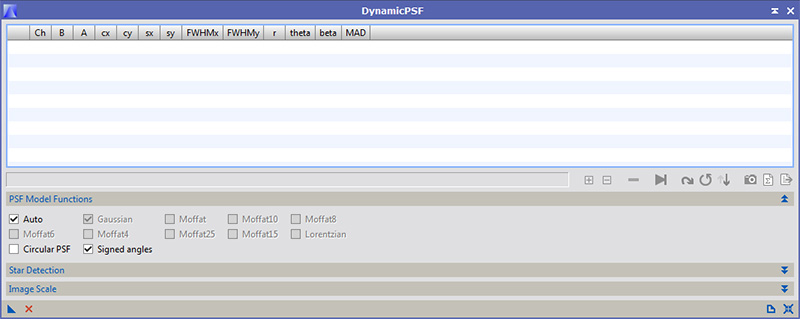
First we need to get a Point Spread Function (PSF) for the stars in the image. Bring up the DynamicPSF tool.
Use of this tool is anything but obvious.
OK, that should give you some insight into why we are going to go through the steps that follow. To do Deconvolution properly, we are going to need three things first:
1) A Point Spread Function for stars in the image.
2) A star mask to help protect the brightest star from ringing artifacts.
3) A mask to protect the background areas in the image from being touched and made more noisy.
First we need to get a Point Spread Function (PSF) for the stars in the image. Bring up the DynamicPSF tool.
Use of this tool is anything but obvious.
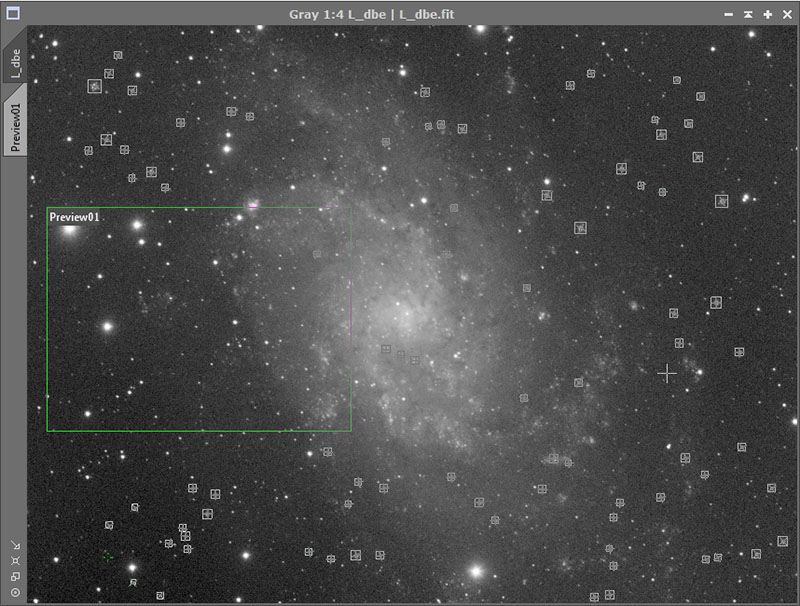
Go back to your image (click the tab on the left on the window). Mine is named L_dbe. Depending on what you have been doing, yours may be named differently.
Now click on stars within the image. They need to be distributed across the image. Take care to avoid ones that are real bright or real faint. It is very important to avoid stars that are saturated (overexposed). Also avoid stars that are real close together. As you click, the results will be added to the DynamicPSF window.
You'll end up with something that looks like this:
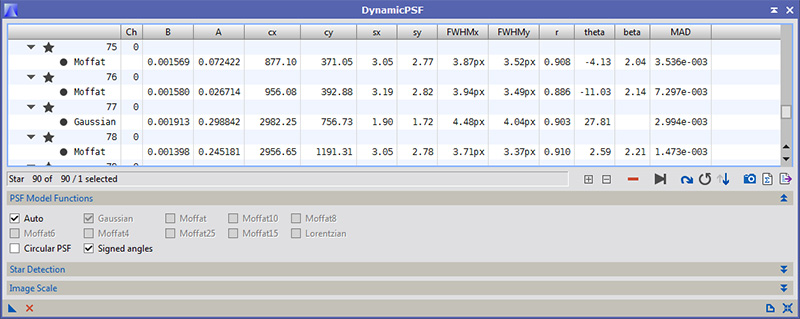
Here is a view of the DynamicPSF window with parameters filled in:
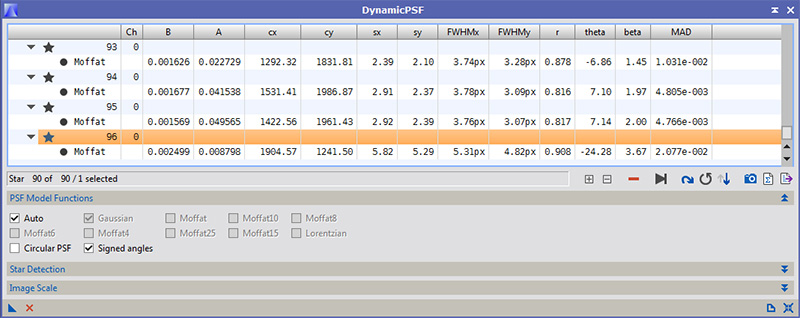
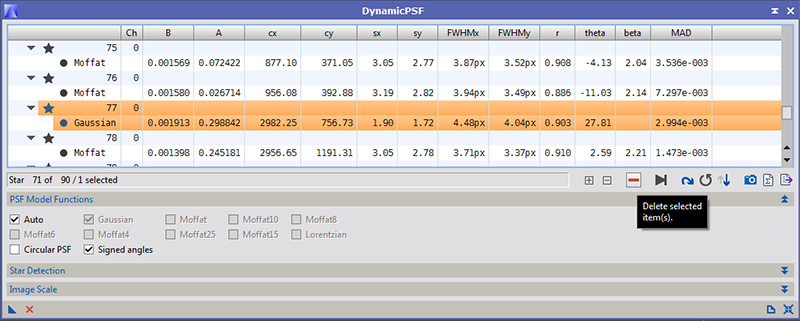
Scroll through the entries in the DynamicPSF window and look for any that say something other than Moffat.
Any such entries are not good for modeling the PSF we need for deconvolution.
Any such entries are not good for modeling the PSF we need for deconvolution.
Those entries can and should be eliminated by selecting them and then clicking the red "-" icon in the DynamicPSF window.
It is now time to export the PSF as an image to be used when doing the deconvolution. Select all the entries in the window [ctrl]a (yes that is confusing since it is the same key sequence used to auto-stretch the data). It is very important to select them all or the PSF you export will be for only the star or stars selected. This is a easy mistake to make.
Once all the entries are selected, click the icon that looks a bit like a camera.
Once all the entries are selected, click the icon that looks a bit like a camera.
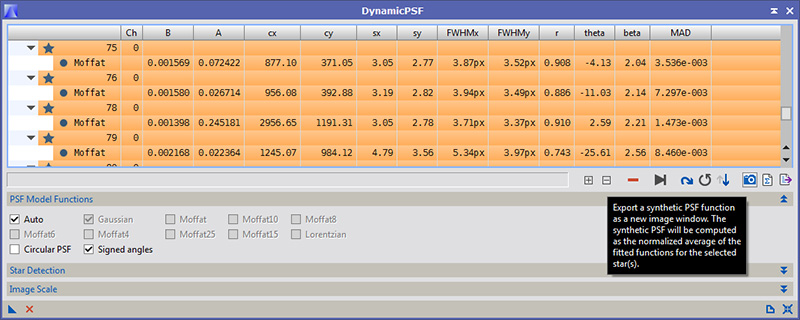
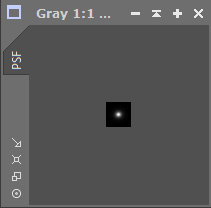
If done correctly, you should now have an image that is your average PSF of those stars. I save that image as a fit file (I called it PSF). After you have the PSF image, get rid of the DynamicPSF window (click the X). Keeping it around will just confuse things later.
Next up is creating a star mask. Fortunately there is a handy tool for this purpose called, wait for it, StarMask (those clever developers). If they were really Unix gurus, they would have called it something like Spot because that was the name of their dog (or biff). OK, enough of the deep inside jokes.
Bring up the StarMask Tool.
Bring up the StarMask Tool.
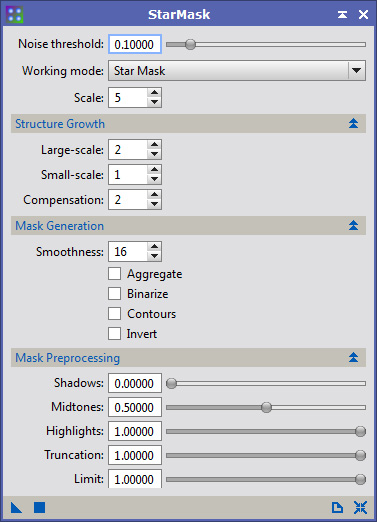
The defaults are reasonable, but I like changing the Noise Threshold parameter. On this image setting it to .05 will pick up a few more stars.
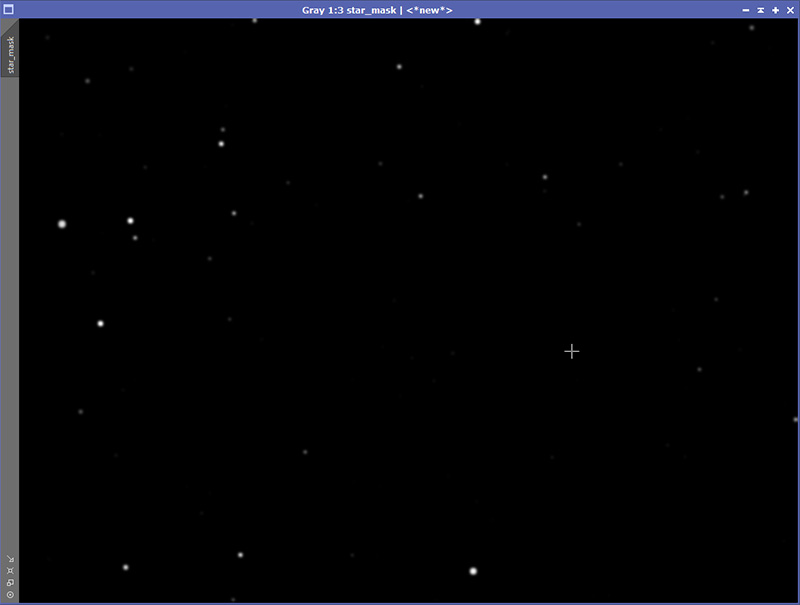
Change that parameter if you wish and then drag the triangle at the bottom of the StarMask window over the image of M33. A new window will come up containing the star mask that was created. Don't worry that it does not show every star in the image. We are only using it to protect the brightest stars and it has found those.
(You can do a screen transfer function on it or use [ctrl]a. You will see that it really did pick up only the bright stars).
I save this image as a 32 bit fit (it will want to default to 16 bits). I called mine star_mask.
The last step of preparation for deconvolution is creating a protective mask. For this I'm going to star by using the Screen Tranfer Function. Click the radiation symbol to get the default stretch. Make sure you have selected the M33 image or else you will be stretching something like your star mask or your PSF image.
Now bring up the HistogramTransformation process. HistogramTransformation is used to stretch the data in a permanent way. Once you do this your data is no longer linear (and no good for doing deconvolution).
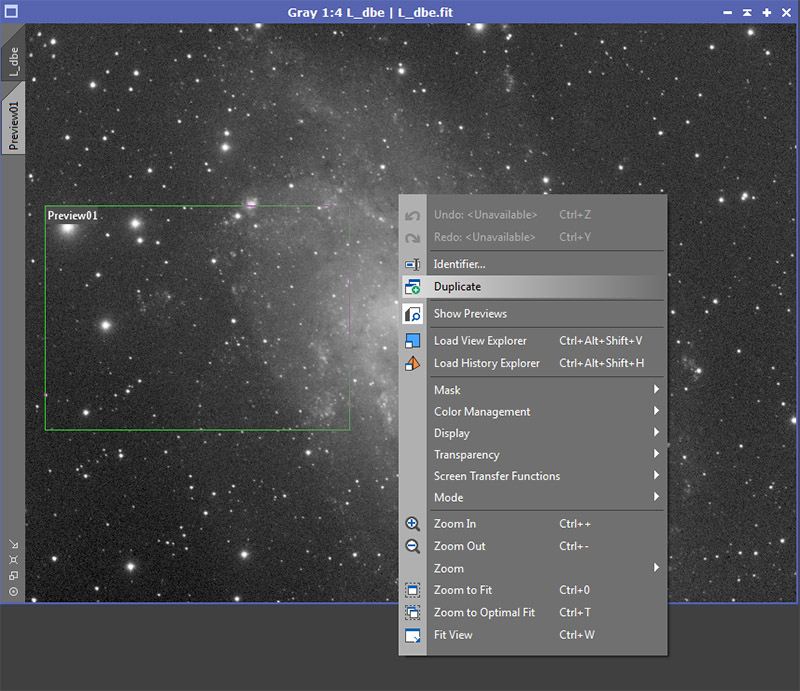
Since we want to create a mask, we need a copy of the M33 image. We can get a copy by clicking the clone button up on the PixInsight Toolbar. (It is about 4 icons over from the left and looks like two windows with a green plus sign over them). Alternatively, we can right click in the M33 image window and select the duplicate entry.
Now bring up the HistogramTransformation process. HistogramTransformation is used to stretch the data in a permanent way. Once you do this your data is no longer linear (and no good for doing deconvolution).
Since we want to create a mask, we need a copy of the M33 image. We can get a copy by clicking the clone button up on the PixInsight Toolbar. (It is about 4 icons over from the left and looks like two windows with a green plus sign over them). Alternatively, we can right click in the M33 image window and select the duplicate entry.
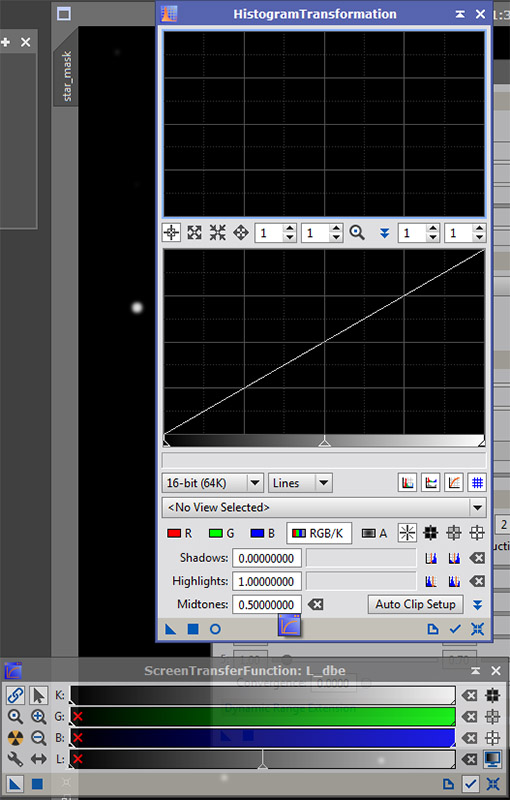
Ok, now is we play Felix and reach into our bag of tricks. If you followed the instructions and used the screen transfer function to stretch the image, we can apply the settings of the screen tranfer function to the histogram transformation process. You do this by dragging the triangle on bottom left of the STF window up to the bottom of the histogram transformation window.
Unfortunately, this is one of those things that is better demonstrated in video.
Once you have it positioned as shown, then release the left mouse button, and the settings from STF will be applied to HistogramTransformation.
Unfortunately, this is one of those things that is better demonstrated in video.
Once you have it positioned as shown, then release the left mouse button, and the settings from STF will be applied to HistogramTransformation.
Now make sure your cloned image of M33 is selected. Then click the blue check mark on the Histogram Transformation window (if you mouse over it, it will say Track View). You should now have something that looks like this:
Now reset the STF screen to the defaults (no stretch). You do that with the Reset button on the bottom right of the ScreenTransferFunction window (it is next to the blue checkmark and looks like a cross). Make sure you do this on the STF window and not the HistogramTransformation window since it has those icons too.
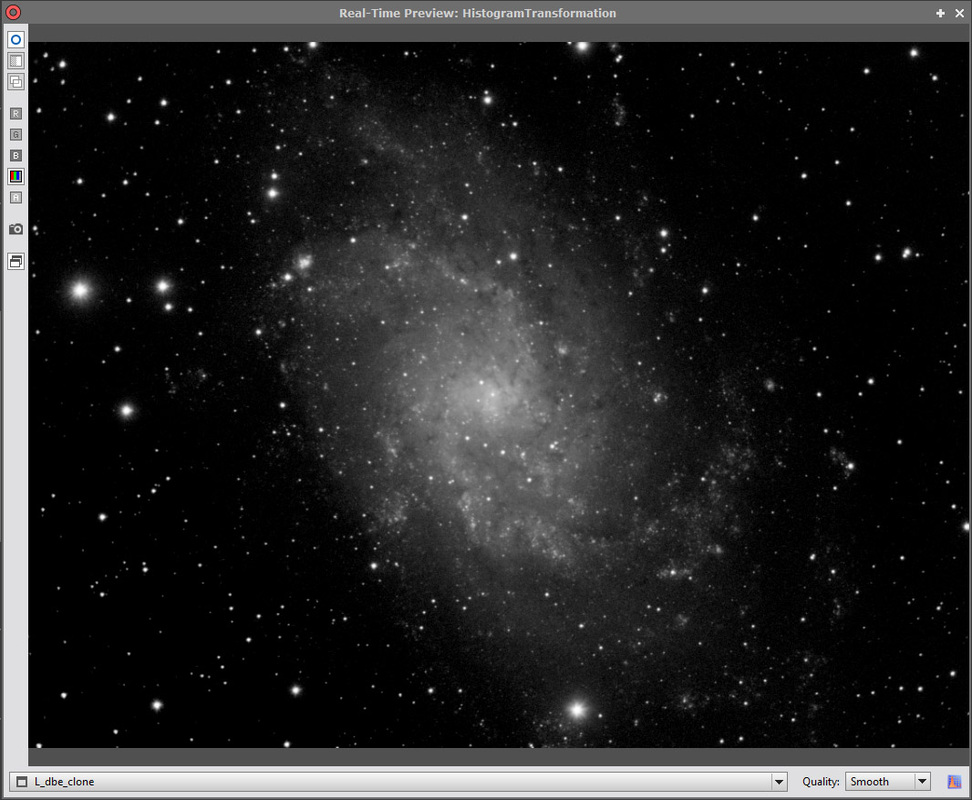
Then get a preview of your histogram transformation by clicking the blue circle icon on the bottom left of the HistogramTranformation Window.
You should now get a real-time preview image:
Then get a preview of your histogram transformation by clicking the blue circle icon on the bottom left of the HistogramTranformation Window.
You should now get a real-time preview image:
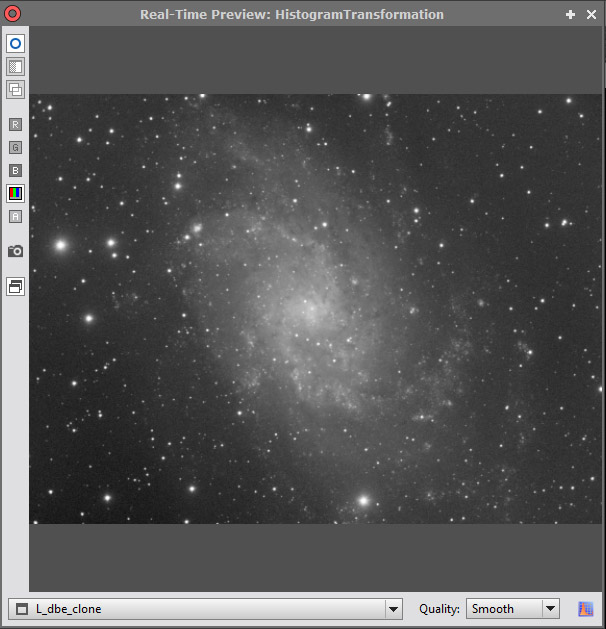
What we want to accomplish is we want to only do deconvolution on the bright parts of the image and not on any of the darker background.
This is one place where clipping the darks is a GOOD thing.
Go ahead and apply the histogram transformation to the cloned image of M33 that we will be using as a mask. Delete the real-time preview and then drag the bottom left triangle of the HistogramTransformation over the the cloned image.
This is one place where clipping the darks is a GOOD thing.
Go ahead and apply the histogram transformation to the cloned image of M33 that we will be using as a mask. Delete the real-time preview and then drag the bottom left triangle of the HistogramTransformation over the the cloned image.
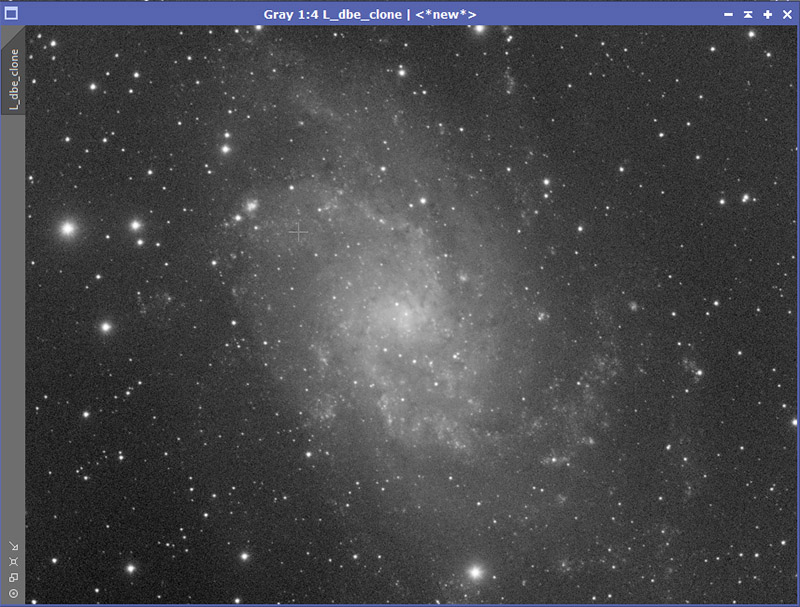
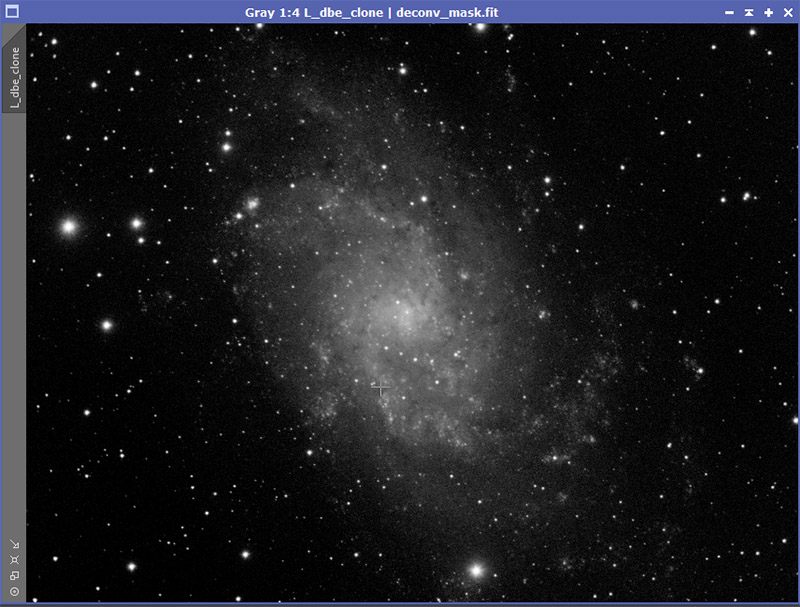
We have not clipped the darks nearly as much as I want.
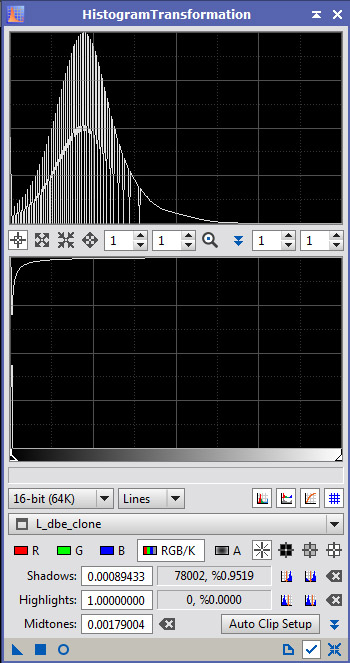
Again using the real-time preview, drag the left slider on the HistogramTransformation over until things look more like this.
Again using the real-time preview, drag the left slider on the HistogramTransformation over until things look more like this.
Here is a view of the HistogramTranformation window.
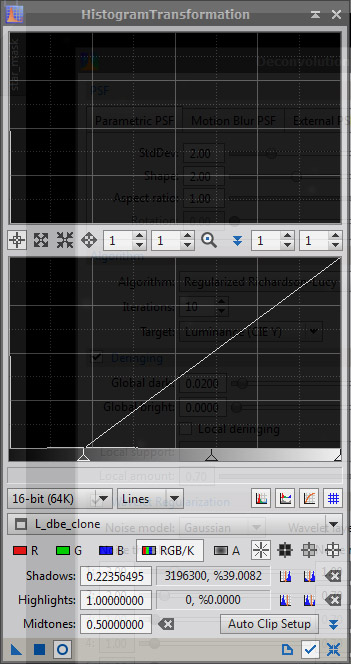
Now dismiss the real-time preview window and apply these settings to your clone of the M33 image. This will now serve as your mask. I save this as deconv_mask.
All the bits are now ready for doing the deconvolution properly. I realize there are a lot of steps in doing this, but with practice, it becomes easier and more natural.
This is a good place to leave off for the night.
This is a good place to leave off for the night.
