Saturation:
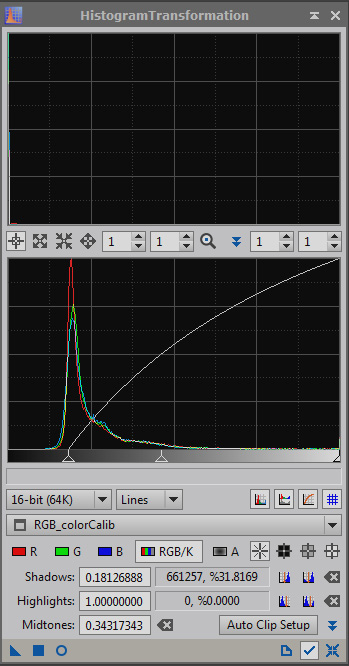
While this is starting to look good, it definitely could use a little color boost. To do this the saturation of the image needs to be increased. However, if you boost the saturation everywhere, you can get ugly colors in the shadows that you don't want. The way to prevent this is to create a mask. Clone the image as before (or you can right click on the image and select, "Duplicate". Then create a histogram. Again, here you probably WANT to clip the shadows. [EDIT: Note that I currently always boost the saturation while the color data is still linear].
While this is starting to look good, it definitely could use a little color boost. To do this the saturation of the image needs to be increased. However, if you boost the saturation everywhere, you can get ugly colors in the shadows that you don't want. The way to prevent this is to create a mask. Clone the image as before (or you can right click on the image and select, "Duplicate". Then create a histogram. Again, here you probably WANT to clip the shadows. [EDIT: Note that I currently always boost the saturation while the color data is still linear].
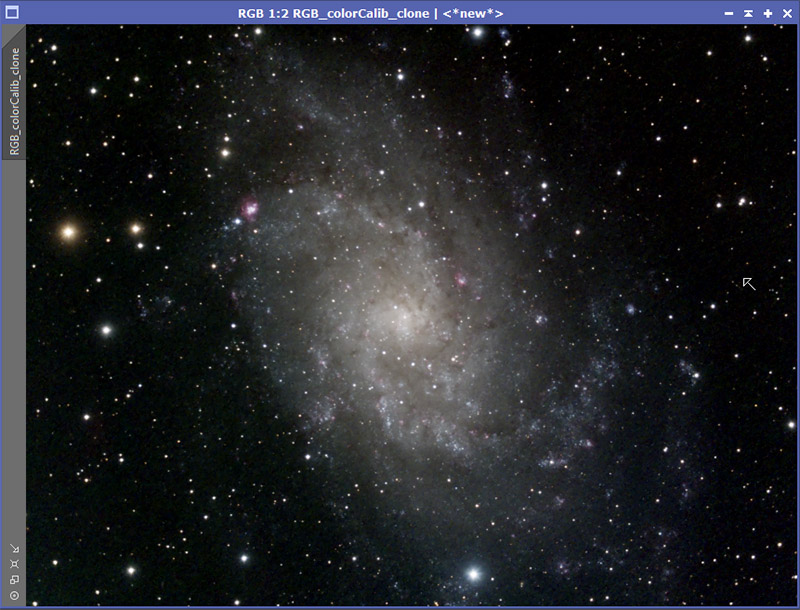
Here is what the mask looks like. If this was football, we would definitely have a penalty. [EDIT: Note that now I always use the L channel whether real or extracted as the basis for my mask when doing this.]
Apply the mask to the image (drag the tab on the right side with the mask name over below the tab for the image). Again, turn off the display of the mask ([ctrl]k).
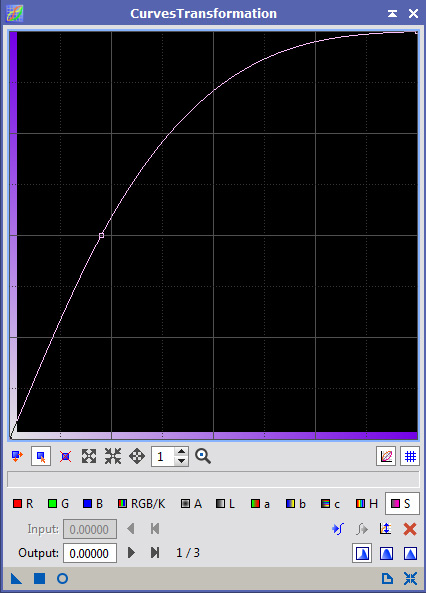
Despite what you might initially think, one of the best ways to increase saturation in an image is to use the CurvesTransformation process. (Logically, you might go looking for a ColorSaturation process and one exists. However CurvesTransformation is the tool we want right now).
To the far right on the CurvesTransformation window, there is an icon with an S beside it. When selected, that puts CurvesTransformation into Saturation mode. Then using real-time preview, adjust up the Saturation. I prefer doing this in two stages for more control. Here is the first take at it.
To the far right on the CurvesTransformation window, there is an icon with an S beside it. When selected, that puts CurvesTransformation into Saturation mode. Then using real-time preview, adjust up the Saturation. I prefer doing this in two stages for more control. Here is the first take at it.
Apply it.
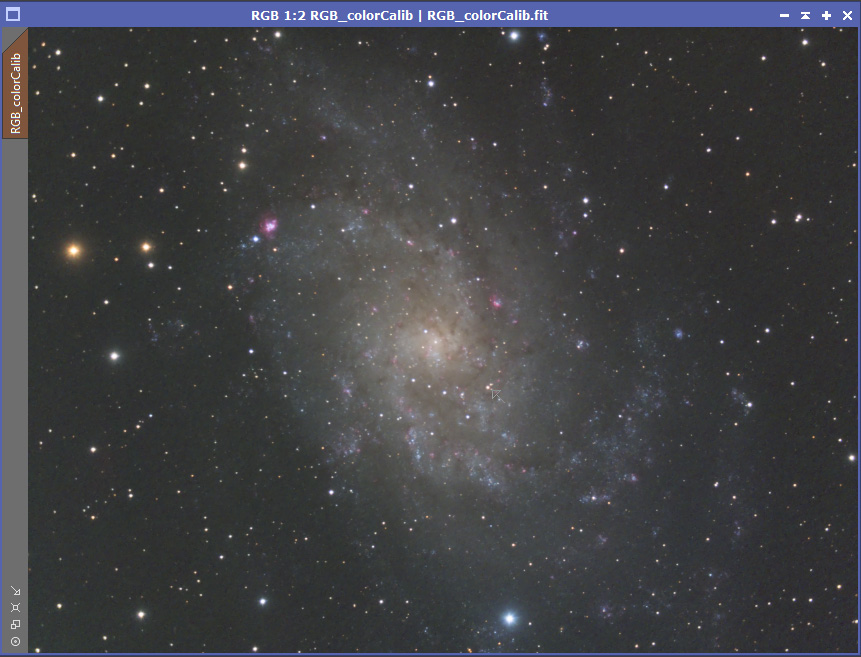
Now a second go around is done to fine tune where I want this. How far to boost the saturation is definitely a matter of taste. Some people like a lot; some like very little.

Applied:
The image must now be saved because it is time to align it with the luminosity channel that was done earlier. I saved mine as RGB_final (with 32 bits Fits of course). Once this is done, bring up the StarAlignment process. Exactly what the files will be called is going to depend on what you named them. The same is true with the folder where you want the result saved. [EDIT: Note that now I always align the color data and the L data together from the start. Then I crop them all the same too (using a process icon I saved with the crop settings). That makes aligning here unnecessary.]
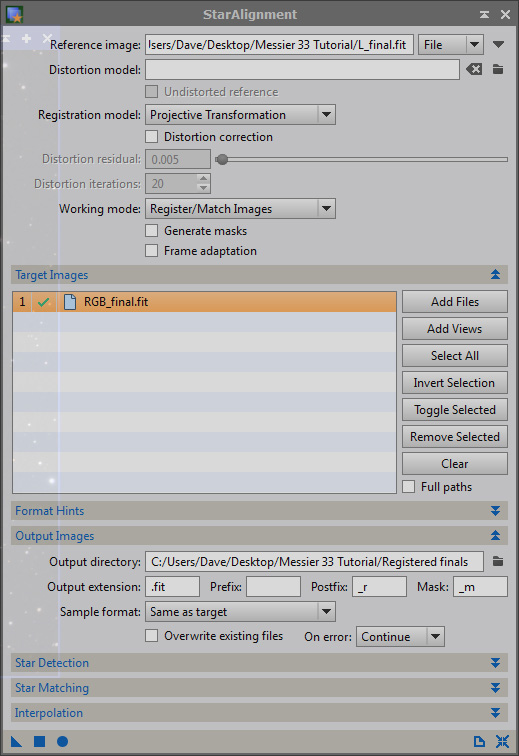
Once this is run, you should now have an RGB file in the specified folder that is aligned precisely with the luminosity file.
NOTE: If as in this case, your data for RGB is binned but your luminosity data is not, the RGB data will now be upsampled to match the luminosity data.
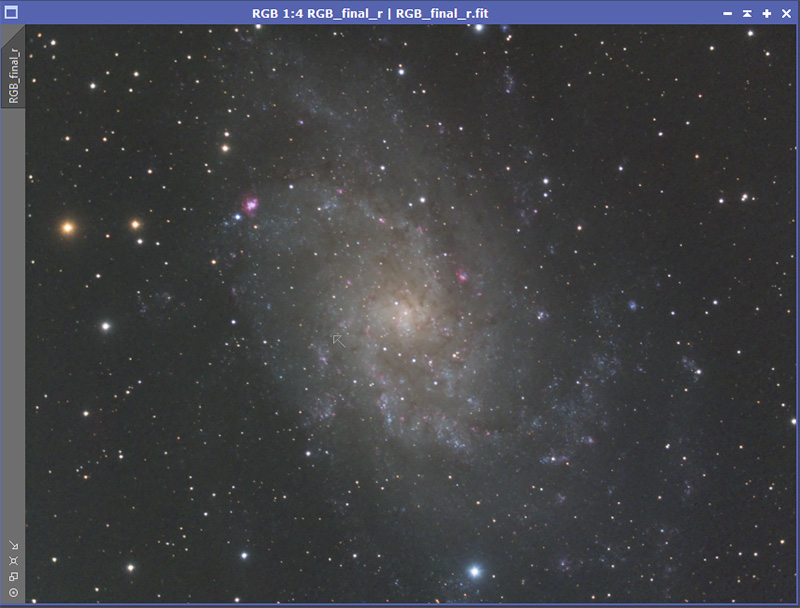
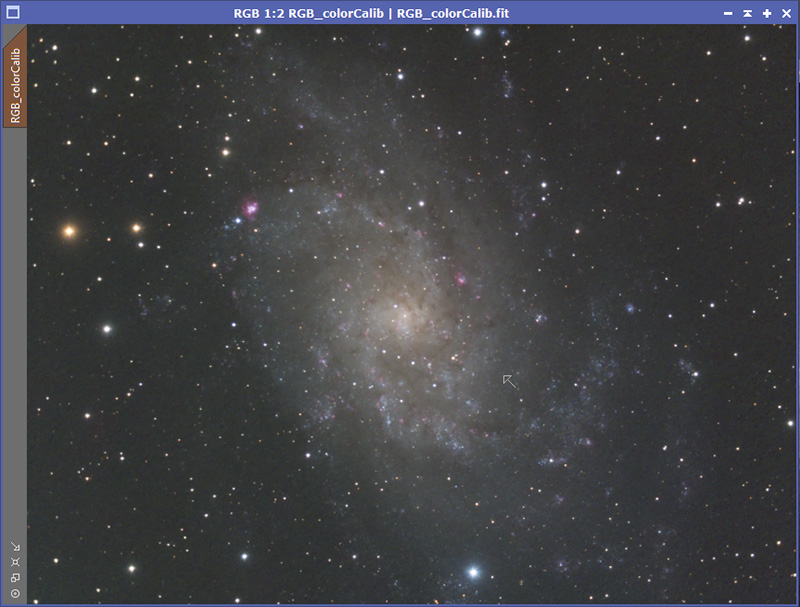
Here is the aligned RGB file. If you compare this image with the previous one, you can see things have been shifted slightly. Note the _r appended to the name.
NOTE: If as in this case, your data for RGB is binned but your luminosity data is not, the RGB data will now be upsampled to match the luminosity data.
Here is the aligned RGB file. If you compare this image with the previous one, you can see things have been shifted slightly. Note the _r appended to the name.